Understanding CSS3 Animations
There are a number of things to understand regarding CSS3 animations and their proper use within web design.

Animations, and movement in general, have come a long way in terms of web design. Animations that were once ostensibly limited to gifs, JavaScript, and flash designs are now possible with CSS3. This helps designers and developers build unique elements while cutting down on clutter and page speed.
That being said, there are a number of things to understand regarding CSS3 animations and their use. With a little bit of knowledge, however, you can use properly placed animations to encourage user interaction and direct the user flow.
Keyframes
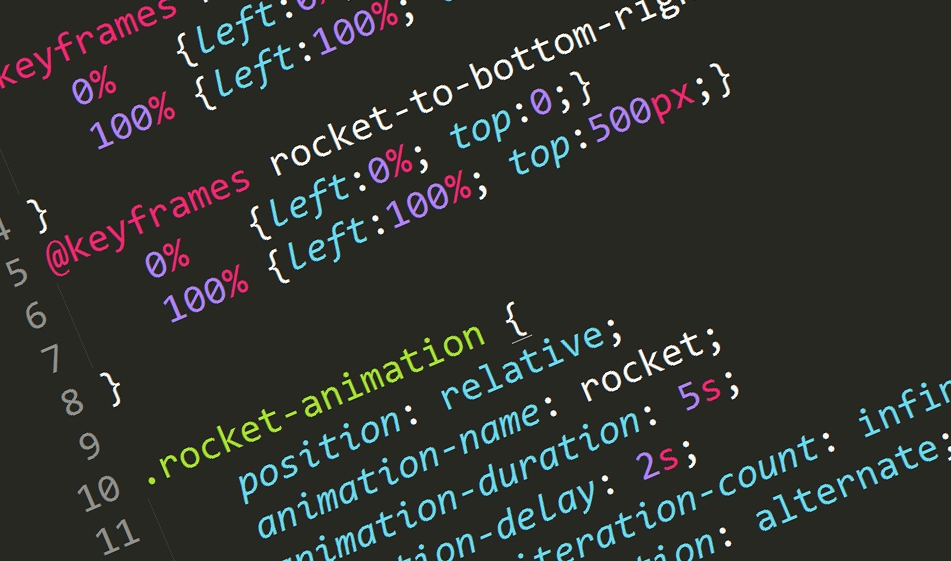
The first thing to understand is that there is a difference between an animation itself and how it is called on a specific element. To that point, an animation is actually created through what are known as keyframes. For example, let’s create an animation called “rocket” that moves an element from left to right. This animation can be created used the following code:
The first percentage in each line declares the relative percentage within the timeframe of a given animation. In the above example, 0% is used as the start time and 100% is used at the end time. The following properties (left and top) are used to specify the position of an element over the course of the animation. At the start of the animation, the element should be flush left and at the end of the animation the element should be flush right.
You can continue to adjust the specific placement of an element by modifying the left and top properties. For example, an animation that moves diagonally from the upper left to the bottom right can be done with the following code:
Of course these are very basic examples. Keyframes, however, are what create your complex animations. By specifying what position an element should occupy, at a specific time over the course of an animation’s duration, you can create all types of animations.
Animation Properties
Defining the keyframes for an animation, however, is just one part of creating a working example. The next step involves actually binding the animation to your given element. This is done through the use of a variety of animation-based properties applied to specific classes as shown below:
There are a host of animation properties that you can use to further customize how a given animation should appear. The most important is the “animation-name” property, as this specifies what animation an element should use. The “animation-duration” property defines how long an animation should last. An “animation-delay” property specifies whether or not you want to run the animation first after a set period (NOTE: this will only apply to the animation’s first run and not any subsequent iterations).
Other important properties include “animation-iteration-count” where you can define how many times an animation should run, including an infinite amount of times. Lastly, the “animation-direction” property gives you the opportunity to specify whether an animation should alternate in directions.
Through the combination of these properties, you can create unique adaptations of existing animation keyframes.
Out-of-the-box Sources
Of course, there are a number of fantastic out-of-the-box resources you can use to get started. One our favorite resources is Animate.css, which includes a wide range of already created animations including a number of zoom, fade, rotating, and sliding properties.
With Animate.css, a predefined animation can be initiated using the below HTML structure:
The benefits of using a third-party source such as Animate.css include your ability to use familiar animations while, at the same time, keeping your own stylesheets clean and minimal.
While using CSS3 animations can certainly added much needed interactive elements to your website, it’s also important to remember the key rule that you should use these animations sparingly. Multiple animations on a given page can contradict the intended purpose of their usage and create confusion as to where a user should direct their intention.
That’s not to say that you shouldn’t use CSS3 animations. With just a rudimentary understanding of the above basics, you can create custom animations that make your design elements stand apart.
Scott Madara
Contributions Editor here at Solodev. Want to be featured on the Solodev Blog? Get in touch.
Follow me on Twitter


