How to Take Screenshots on your PC or Mac
Learn the various ways to take screenshots on your iPhone, Mac or PC in this beginner's tutorial...

There's more to taking screenshots on your iPhone or computer then meets the eye. First, don't make the mistake of paying for tools or browser plugins to take screenshots. Both Mac and PCs have native screenshot-taking functionality and that's what we're going to cover in this tutorial.
Mac
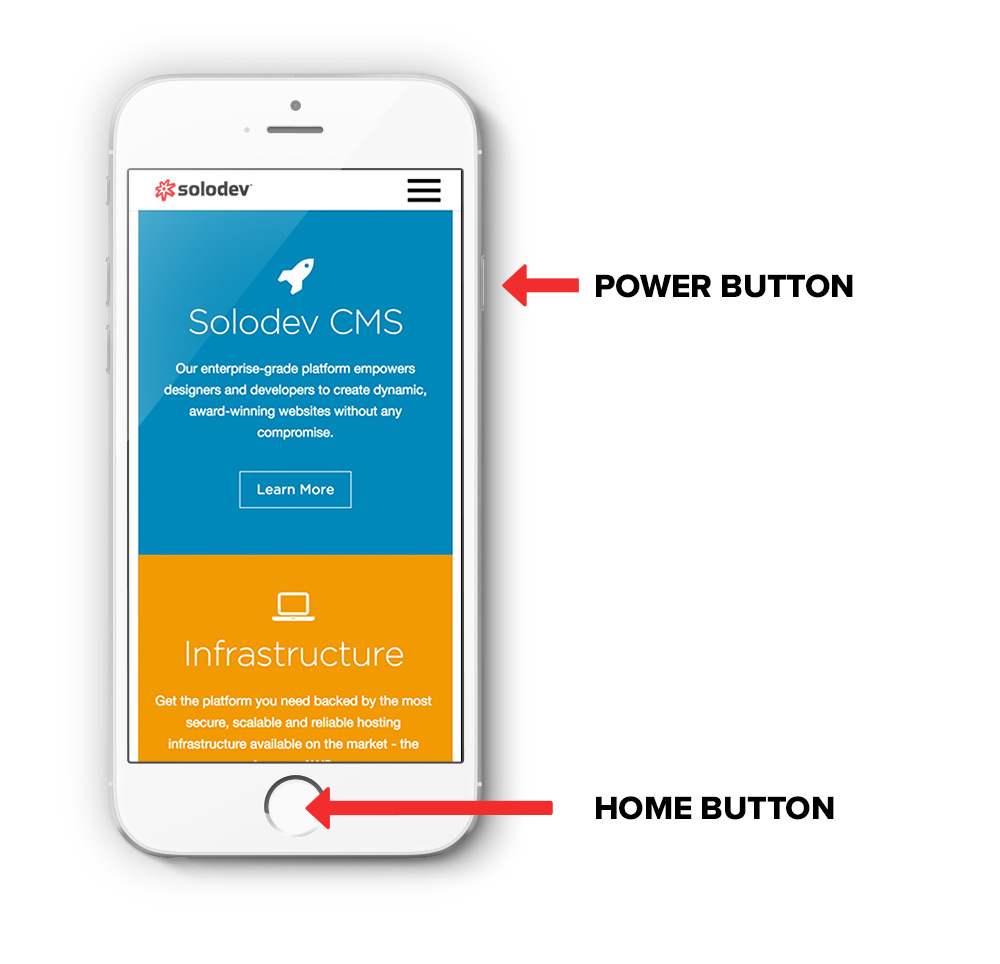
Take a Screenshot of your iPhone
- Press and hold the Sleep/Wake button on the top or side of your device.
- Immediately press and release the Home button.
- To find your screenshot, go to the Photos app > Albums and tap Camera Roll.
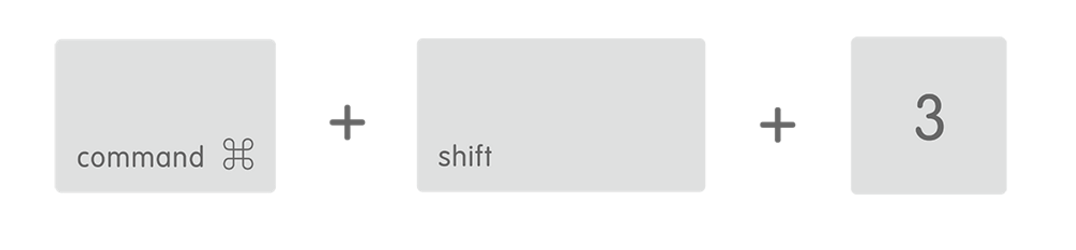
Take a Screenshot of your Desktop
- Press Command-Shift-3
- Find the screenshot as a .png on your desktop
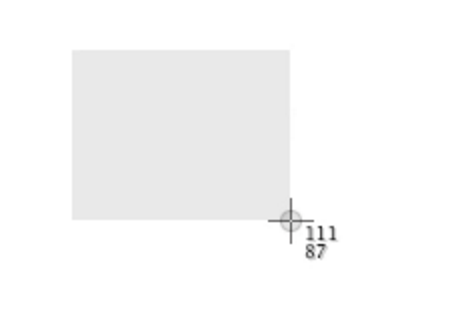
Take a Screenshot of Part of your Screen
- Press Command-Shift-4. The pointer changes to a crosshair pointer.
- Move the crosshair pointer to where you want to start the screenshot.
- Drag to select an area. While dragging, you can hold the Shift key, Option key, or Space bar to change the way the selection moves.
- 4. When you've selected the area you want, release your mouse or trackpad button. To cancel, press the Escape (esc) key before you release the button.
- 5. Find the screenshot as a .png file on your desktop
PC
Press the Print Screen (shortened to "Prt Sc") Key saves your image to the clipboard
- or -
Press Alt + Print Screen to Capture Screenshot of active window saves your image to the clipboard
Windows Snipping Tool

Select the arrow next to the New button, choose the kind of snip you want, and then pick the area of your screen that you want to capture.
Capture a Snip of a Menu
- fter you open Snipping Tool, open the menu that you want a picture of. (For Windows 7, press Esc before opening the menu.)
- Press Ctrl + PrtScn.
- Select the arrow next to the New button, choose the kind of snip you want, and then pick the area of the screen that you want to capture.
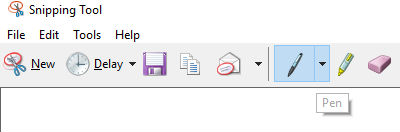
Annotate a Snip
After you capture a snip, you can write or draw on or around the snip by selecting the Pen button.
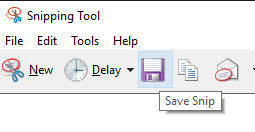
Save a Snip
- After you capture a snip, select the Save Snip button.
- In the Save As box, enter a file name, location, and type, and then select Save.
Remove the URL
When you capture a snip from a browser window and save it as an HTML file, the URL appears below the snip. To prevent the URL from showing up:

- In the Snipping Tool, select the Options button.
- In the Snipping Tools Options box, clear the Include URL below snips (HTML only) check box, and select OK.
Share a Snip
After you capture a snip, select the arrow next to the Send Snip button, and then select an option from the list.

Matthieu McClintock
Contributions Editor here at Solodev. Want to be featured on the Solodev Blog? Get in touch.
Follow me on Twitter


