How to Create an "I Want To" Menu Navigation
Adding an "I Want To" button to your website is a simple, effective way to enhance navigation by featuring links to your most requested pages – helping visitors find content quickly and easily.

Ever been to a restaurant with a menu that goes on and on? There's one in particular that has so many choices it's almost impossible to decide. That can be intimidating to a lot of patrons.
This same experience can be true of vast, content-heavy websites. A massive menu – just like the restaurant – can wreak havoc on the customer experience, leaving them asking: Where do I go? How do I find what I'm looking for? Why am I here again?
Helping your visitors navigate to the right content is one of the most important missions for a website. The more obstacles or clicks to find something, the more likely a visitor is to bounce. When you have a lot of content, it's even more important to have a clear, well-thought-out, responsive navigation. You can organize all of the different paths to content with layer upon layer of structure, but that can be cumbersome if someone doesn't know where to start.
So how can you improve your navigation without upending everything – and provide visitors with a faster path to what they're seeking? By giving them exactly what they want.
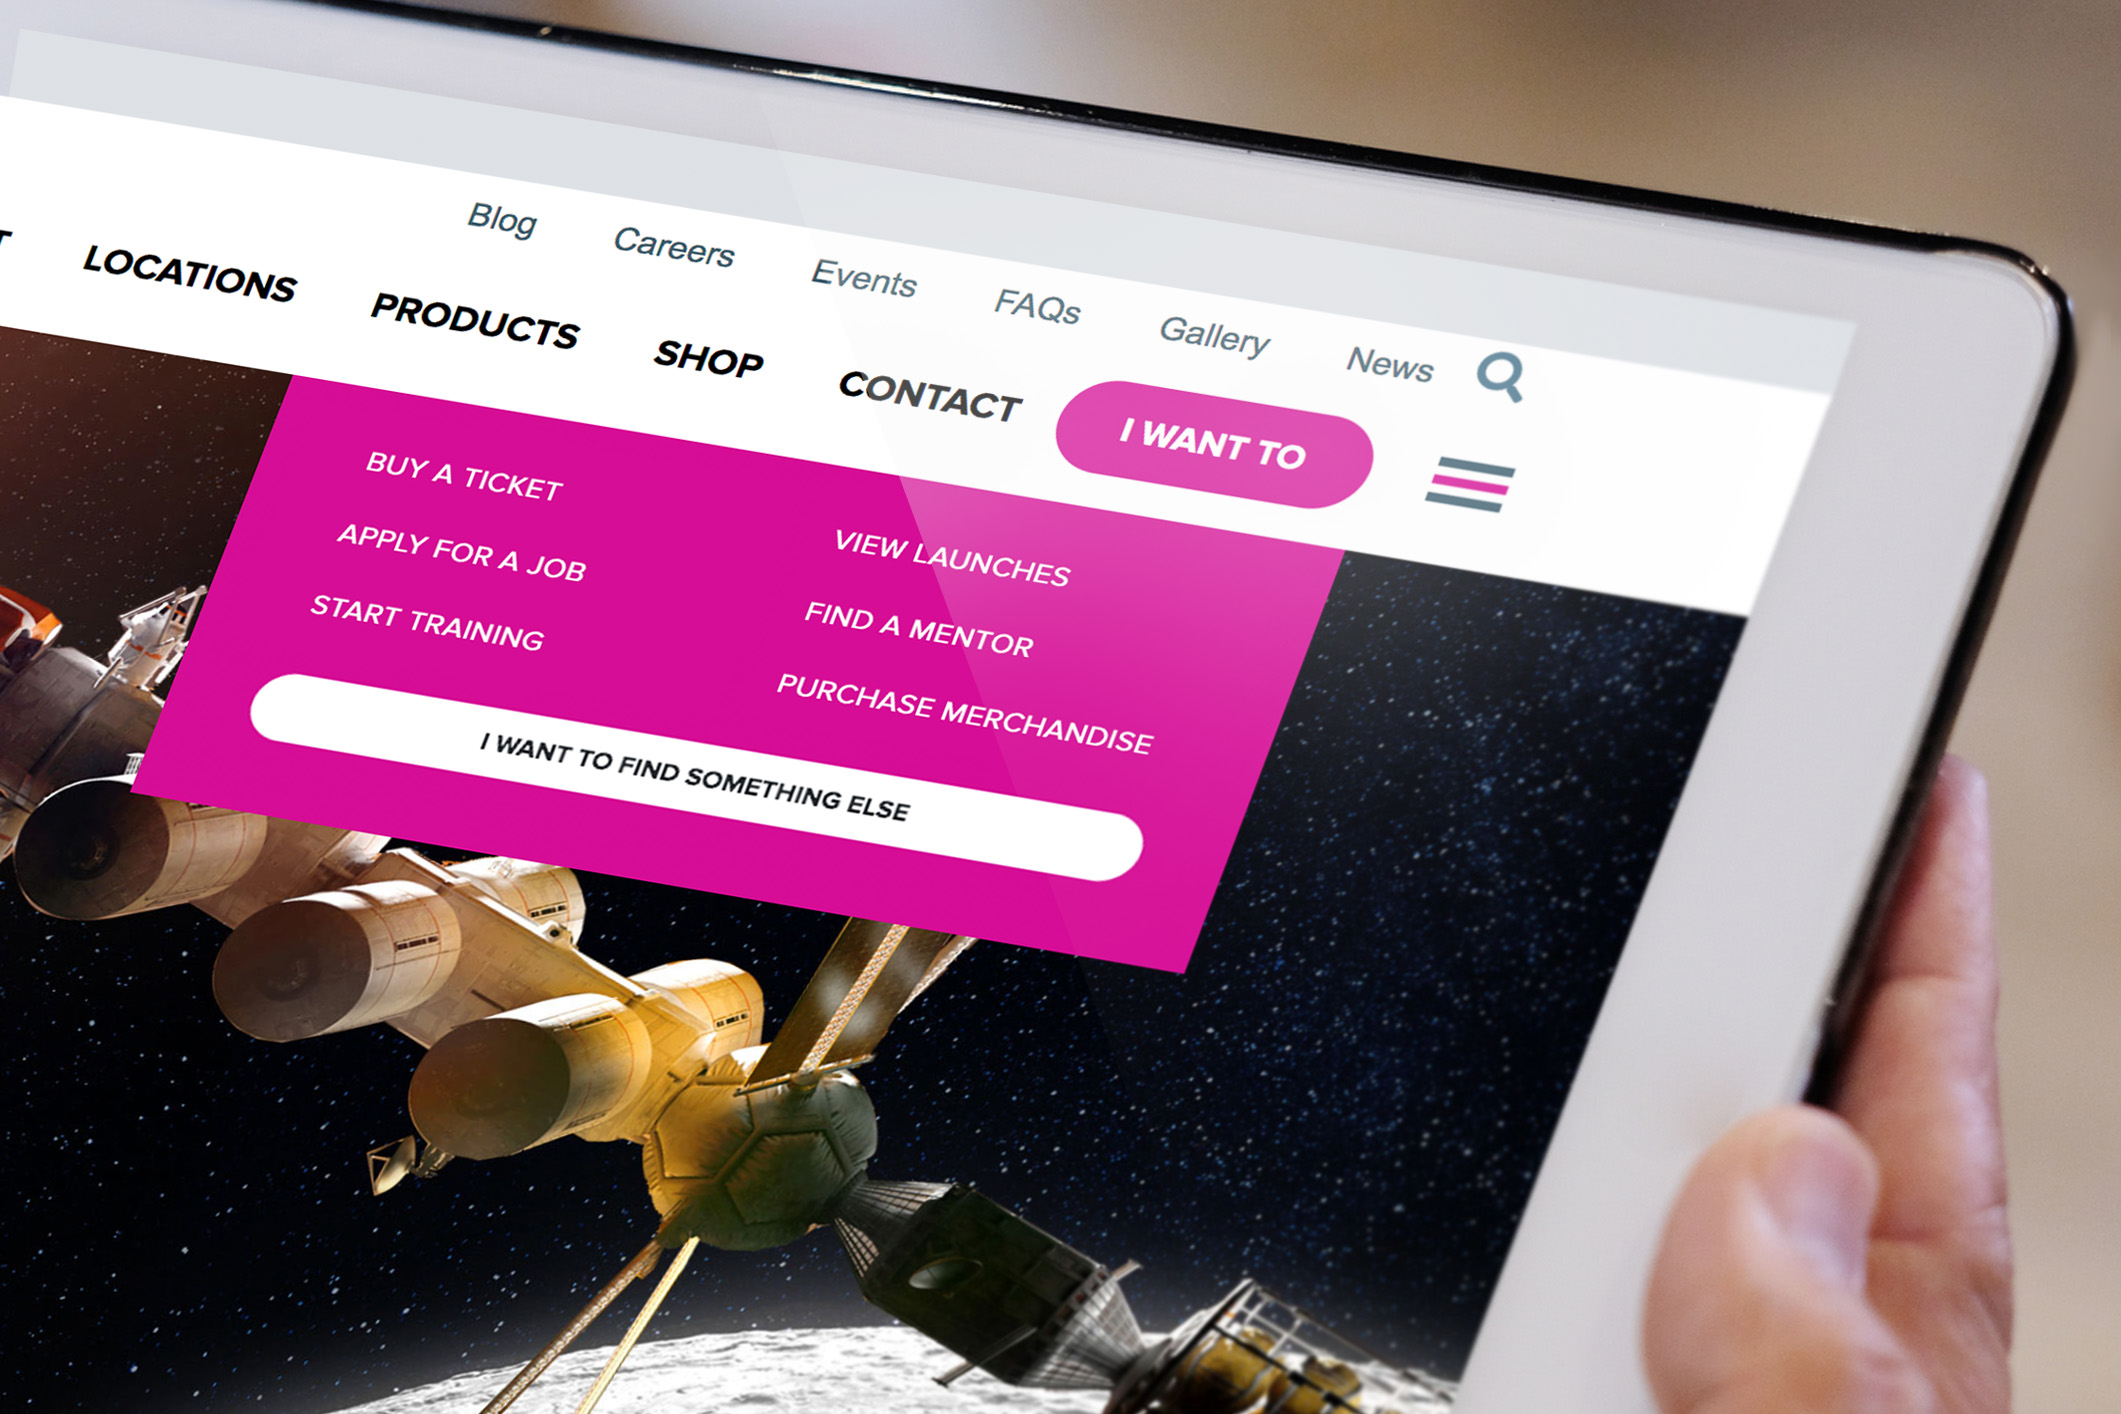
The "I Want To" is a data-driven shortcut to the most important things your customers are looking for. It's a collection of the top requested links across your taxonomy, all accessible from a simple button. It's designed to speak directly to your audience, guiding them to resources based on common searches and quantified website traffic. This could be anything from registering for a class, applying for a job, checking a schedule – the list goes on.
In this article, we're going to show you how to add a simple "I Want To" menu to your own website. We'll be adding it to your header navigation, which is a ubiquitous marker for maneuvering almost every website. There's lots of UX research out there that backs this up, including heat map studies around mouse tracking and eye movement.
While building the feature is simple, the most important work is done with your website data and analytics. To make your "I Want To" both meaningful and efficient, spend time identifying which pages, keywords, and search terms your customers are looking for. Be sure to keep the list short and direct, and it's helpful to have your links answer the question "I Want To" in a logical manner. For example: "I Want To... Pay a Bill" or "I Want To... Place an Order."
Speaking of orders, let's get to how you can create an "I Want To" button for your website.
Getting Started
Since we're using Bootstrap to build the navigation menu, go ahead and insert the Bootstrap links below in the head section of your project's HTML file:
HTML
The HTML code below includes the entire header navigation to show our "I Want To" menu in context. Feel free to copy and use it in your project. If you'd only like to use the "I Want To" button and menu, you can do that as well. The menu is inside a list item with an extra classname of .d-none and in a ul list with 4 links and a link at the bottom, there's another link called "I want to find something else". This link's purpose is to take the visitor to an "I Want To" main page where all the important links are displayed. If you don't wish to have a separate page for "I Want To" links, you can omit this button on your website.
CSS
The CSS code below includes the necessary positioning, layout, dimensions of the menu. Feel free to change the colors, background colors and font styling for your own website:
And there it is. Check out the JSFiddle example below and hover over the "I Want To" button to see how the menu looks like:

Paris Tuzun
Contributions Editor here at Solodev. Want to be featured on the Solodev Blog? Get in touch.
Follow me on Twitter


