How to Create a Department Listing or Directory Page (Part 1)
If you have multiple departments or directories in your organization, it’s important to create a single page that lists important info as well as links to separate pages.

Layout and visual design matter a lot when it comes to listings or directories. Yet, just like breadcrumbs, they're often an overlooked part of websites and digital design.
Easy-to-use directories are especially important for organizations or companies with a lot of departments. It's crucial that links on directory pages are laid out in an intuitive way for an audience. More often than not, listings of departments or directories are just a list of plain links with no visual distinction. Some websites -- like Craigslist -- can get away with using a very plain and unstyled look to their links. However, for a majority of websites, designing listing pages to be more visually appealing will help users find what they need faster while building out your brand's credibility.
As you design your directory page, here are a few important reminders to consider:
Use white space and give directory links enough space
Using white space will make the links more legible and easier to follow. If you have a lot of links on your listing or directory page, it is crucial that the users can skim through the links without their eyes getting tired.
Keep design consistent across pages
The same visual design patterns you apply on other parts of your website should be applied to your directory pages as well. Use colors that make the links easy to read, use borders creatively to distinguish link blocks from each other and apply hover effects to the links. Follow the same branding guidelines you established for your website for branding consistency.
Use lists instead of divs
While on the surface it makes no difference to use the ul list tag vs divs to create a listing, using ul lists will make your listing page more accessible to users with disabilities who often use screen readers. Elements such as divs and spans are non-semantic meaning the browsers can't tell what kind of content is inside those tags whereas elements like nav, ul will tell the browser that the items inside them are related to each other.
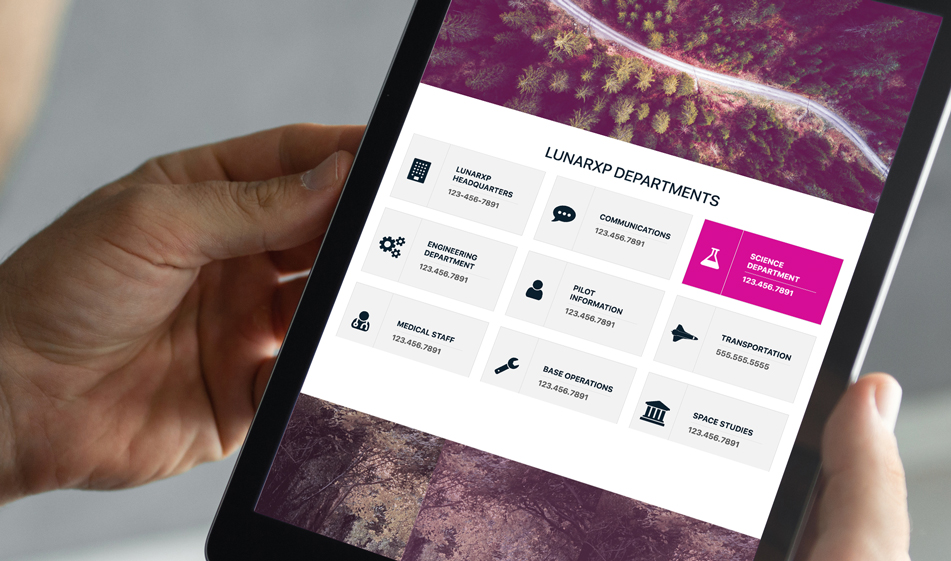
Use images or icons to accompany links
Depending on the number of links you have on your listings page, you can use images or icons to help distinguish the links from each other and give the users further clue on what the link is about. If you have fewer than ten links, you can use images as background for your links. However, on a long list of links, images will make the skimming over the links very difficult and furthermore, they will increase the page load time and slow down the website. In this case, using icons is a great idea.
Now that we talked about the importance of listing pages and what to pay attention to when designing them, let's get to how we can build them.
We're using Bootstrap for the layout and FontAwesome for the icons. Include the below external links in your HTML file:
HTML
The HTML below is fairly straightforward. It contains a ul element with 9 list items. Inside each list item there is an a element that covers the whole list item so that the entire li item is clickable. There are two div elements, one that includes the icon and the one that includes the department name and phone number. Copy and paste the code in your HTML file and feel free to edit the icons as the number of list items.
CSS
Below is the complete CSS to align the icons and the text and add hover effects:
And there you have it. You can re-size the JSFiddle below to see how the boxes respond to various browser sizes:

Paris Tuzun
Contributions Editor here at Solodev. Want to be featured on the Solodev Blog? Get in touch.
Follow me on Twitter


