Building an Effective Client Showcase with Solodev
Showing off your clients and how your product or service has benefited them is integral to sales growth.

Advanced
Solodev Required
This tutorial covers building a client showcase module in Solodev using shortcodes.
Showing off your clients and how your product or service has benefited them is integral to sales growth. Displaying them effectively so that potential clients can find relevance in the content you display is crucial to growing your business.
Part I - Creating the Client Overview Page
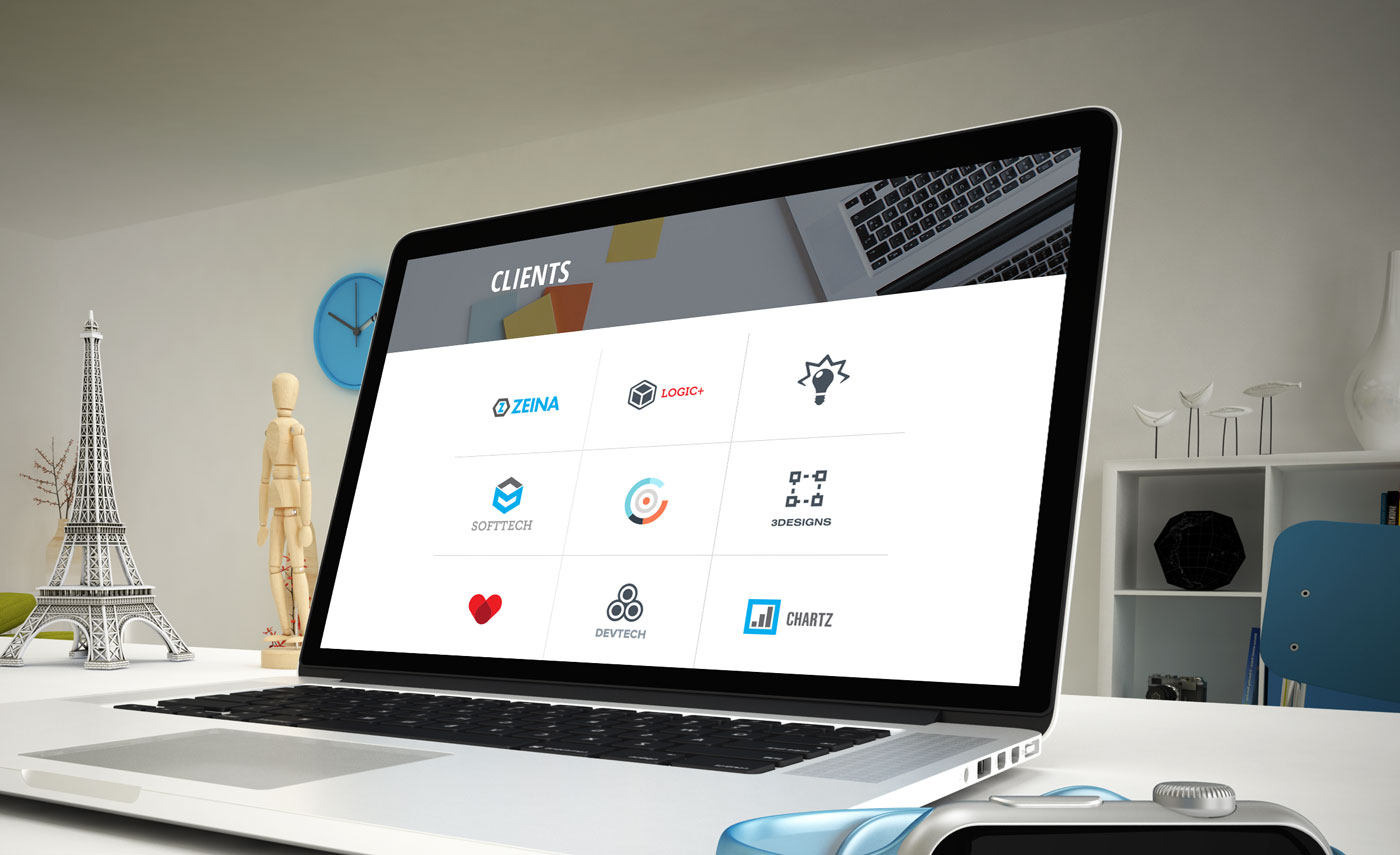
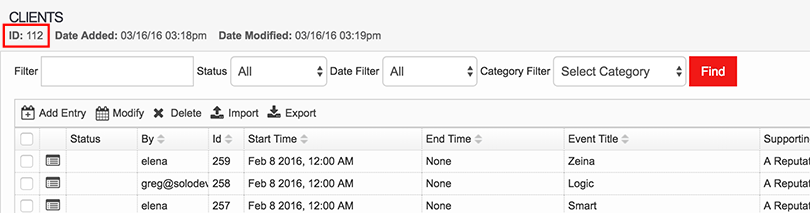
The overview page will display all of the client logos across the page as shown above.
Step 1 - Create your Client Showcase Module
Open the folder to which you want to add your client module. Hover over the Add button and select Calendar.

For enterprise users, we suggest creating your modules inside your "Data Center" directory.
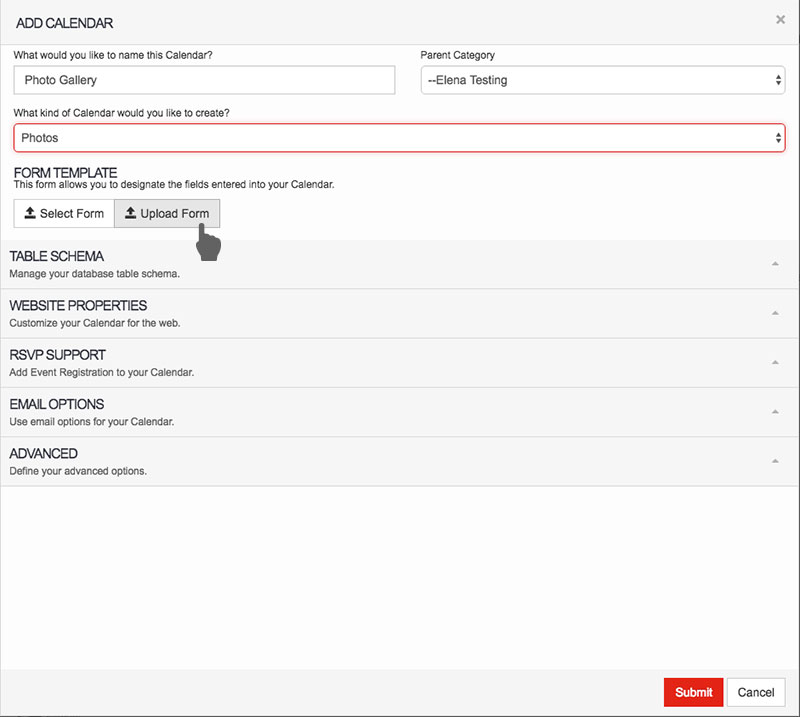
Step 2 - Upload your Client Showcase Form
The code below will add the appropriate fields to your client showcase module. First you will need to save this code to your computer as a simple text document with .tpl at the end of the file name such as "client-form.tpl".
Click on Upload Form and select the file you just saved. Then click Submit.
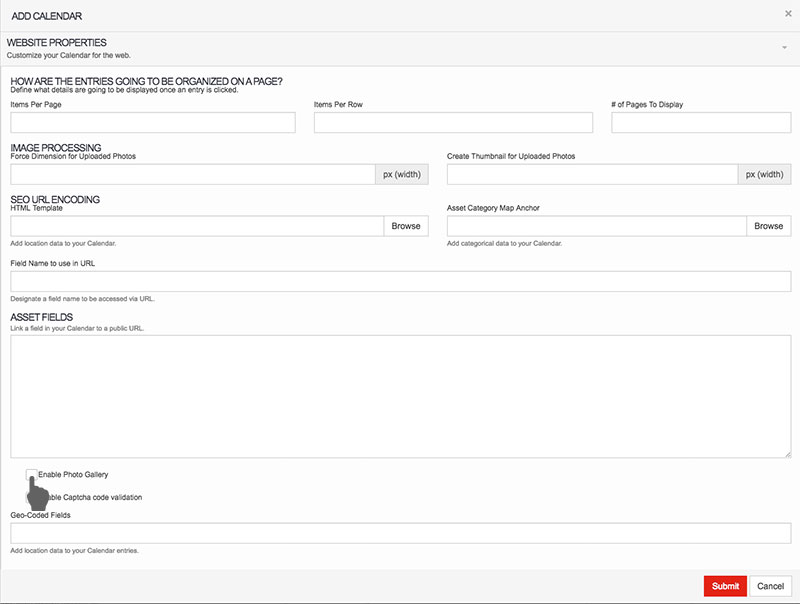
Step 3 - Enable your Photo Gallery
Open the Website Properties Tab and check the Enable Photo Gallery checkbox. Then click Submit.
Step 4 - Create your Repeater Template
Copy and paste the code below into a new file called repeater.tpl inside your module folder
[/code]Note - the only thing that needs to be edited in this code, is the following section:
repeater id="" limit="0,9" type="calendar"
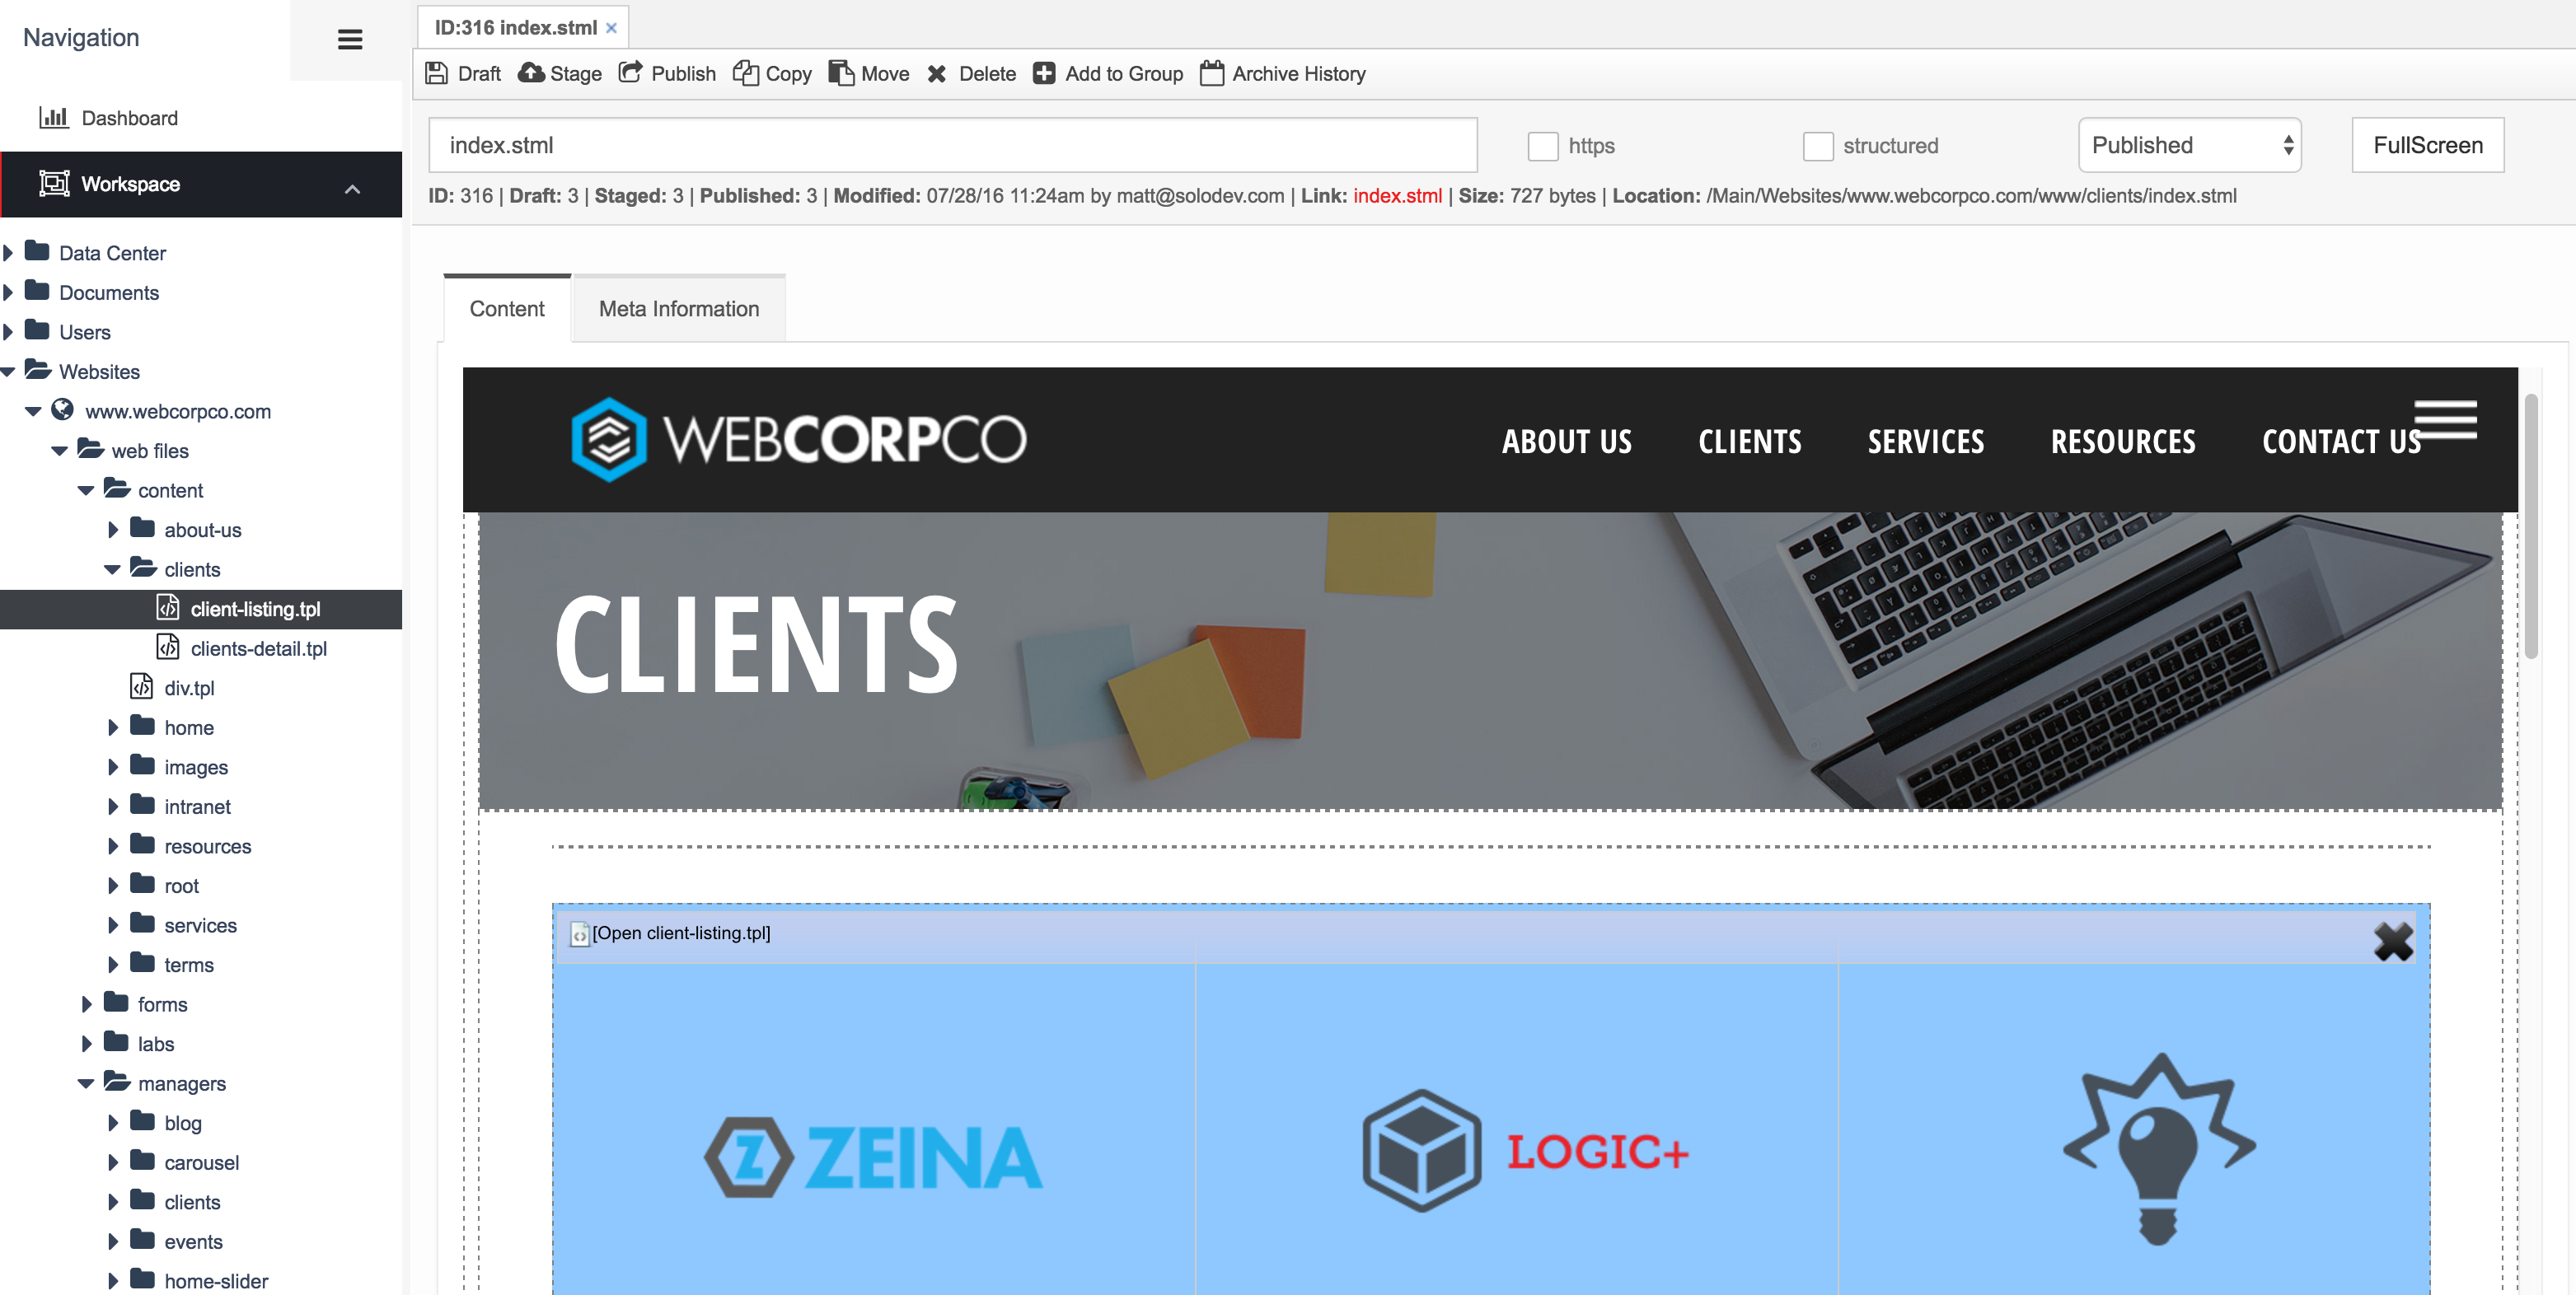
The repeater id="" needs the ID of the logo carousel manager. Open the logo carousel manager and look for the ID at the top left under the name of the module. Place the ID number inside the quotes ("").
The image below outlines where to find the ID of the module.
Step 5 - Style your Client Showcase
Add the CSS below to a file called clients.css in the 'CSS' folder of your assets
Step 6 - Add your repeater template to your index page
Navigate to the index page that will contain your repeater template. In order to place the file into your STML, you need to select the Dynamic Div (Drop Zone) in which you’d like to place it by clicking on it.
Part II - Creating the Client Detail Page
The client detail page displays the detail information for each entry. In this case it will contain the main image, title, client intro and client description.
Step 1 - Create your Detail Template
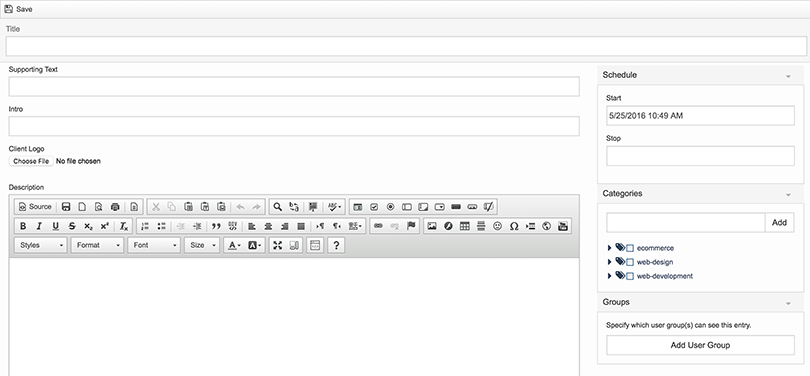
Open your client module folder by clicking on it in the left hand nav. Hover over Add button and select File. Name the file and make sure you use .tpl at the end of the file name. Paste the code below into the file. Then click Save.
Step 2 - Add your detail template to your detail page
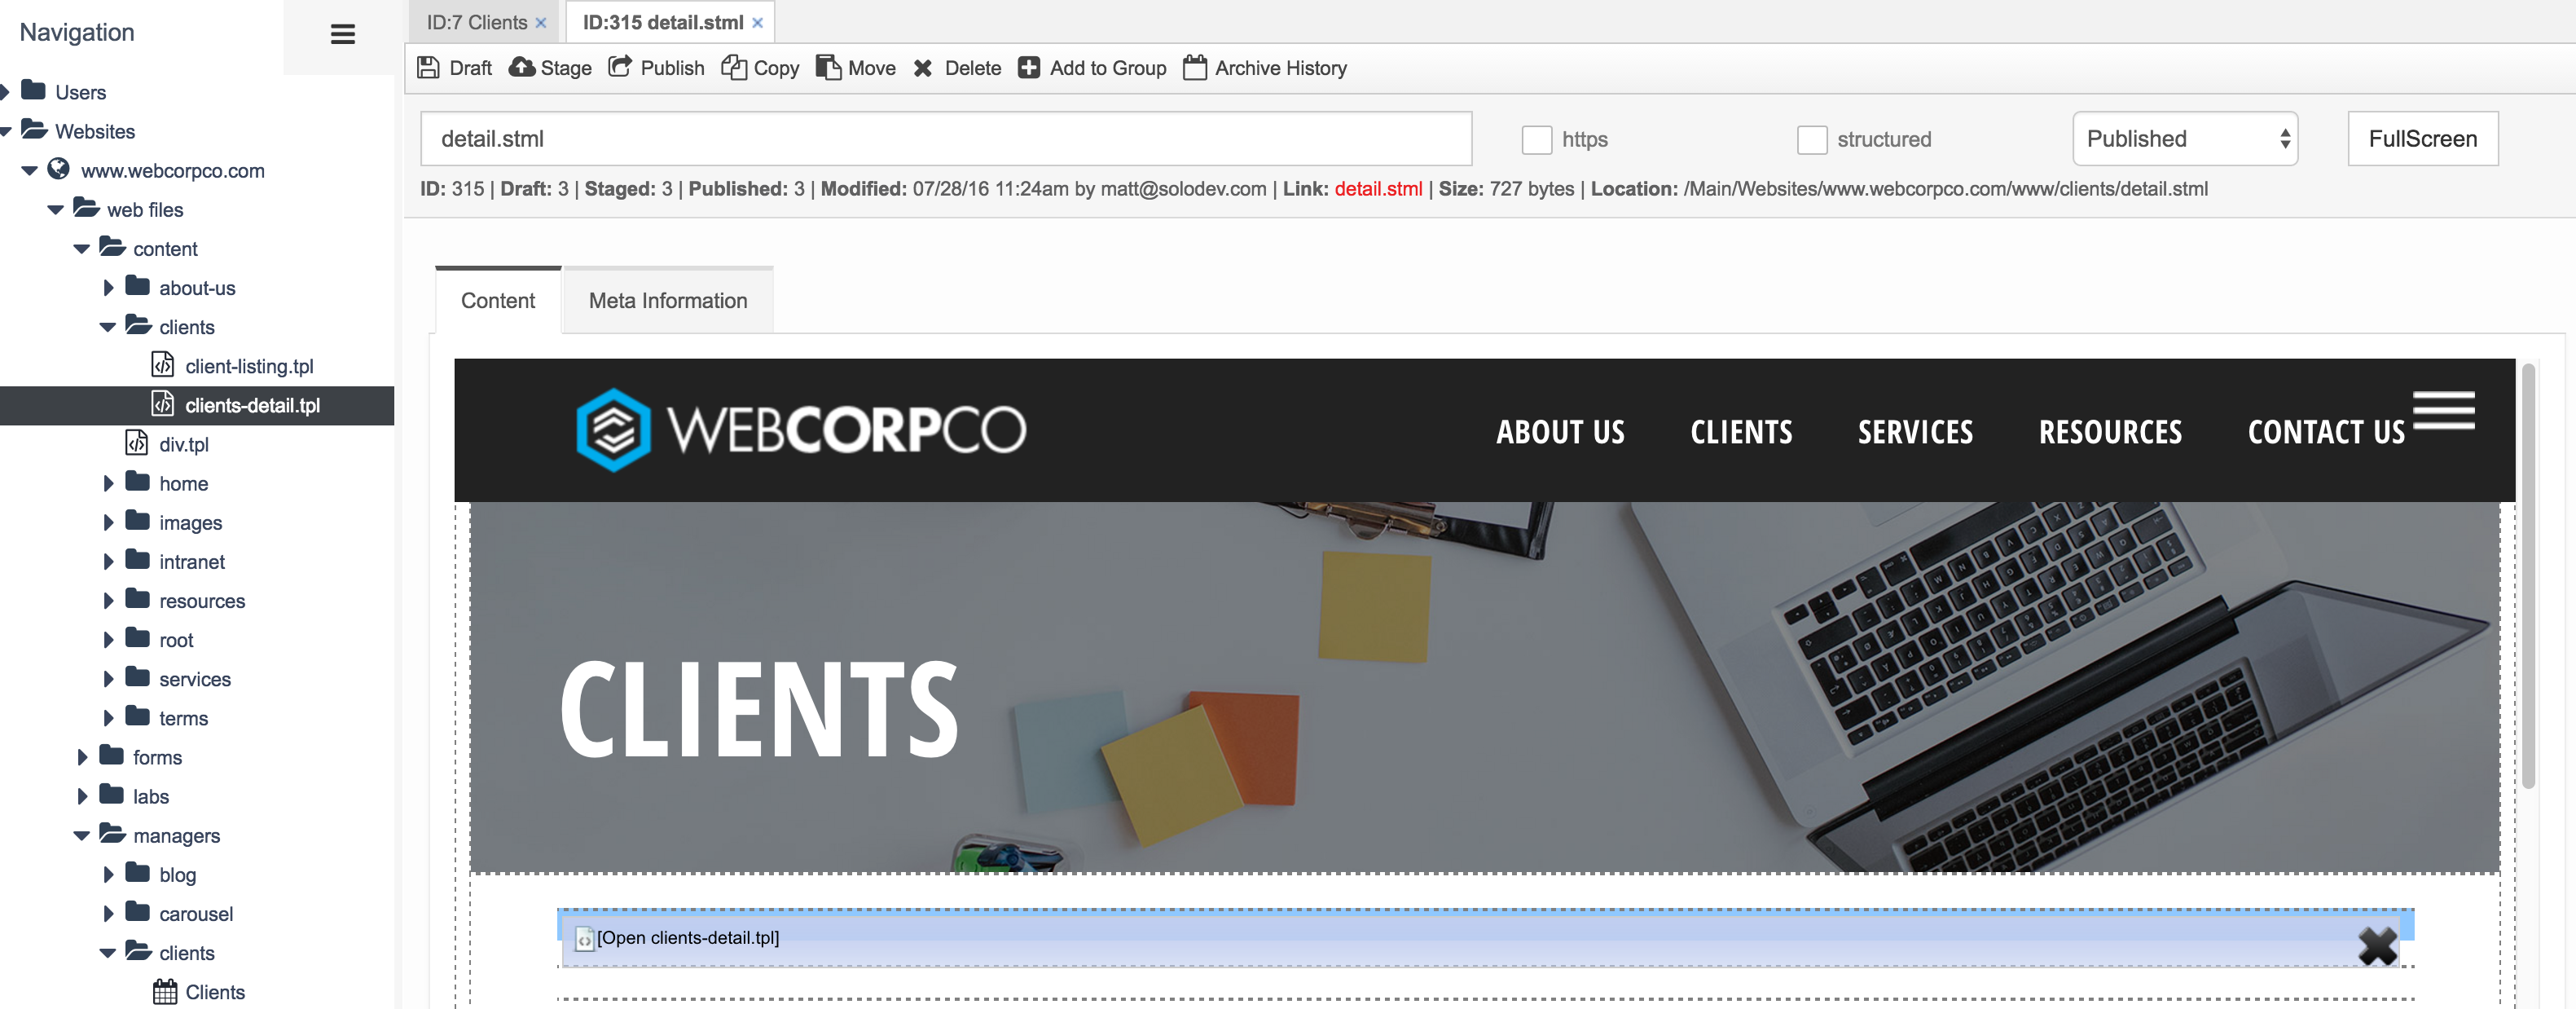
To display the detail information of the clients, you will need to create a detail page (detail.stml) in the same folder as your index.stml page. In order to place the file into your STML, you need to click on the Dynamic Div into which you would like to place it as shown below.
Part III - Map your Module to your STMLs
Now that you have created the client module and have the index and detail pages in place, you will need to map the Module to your new folder and index and detail pages.
Step 1 - Modify your Client Showcase Module
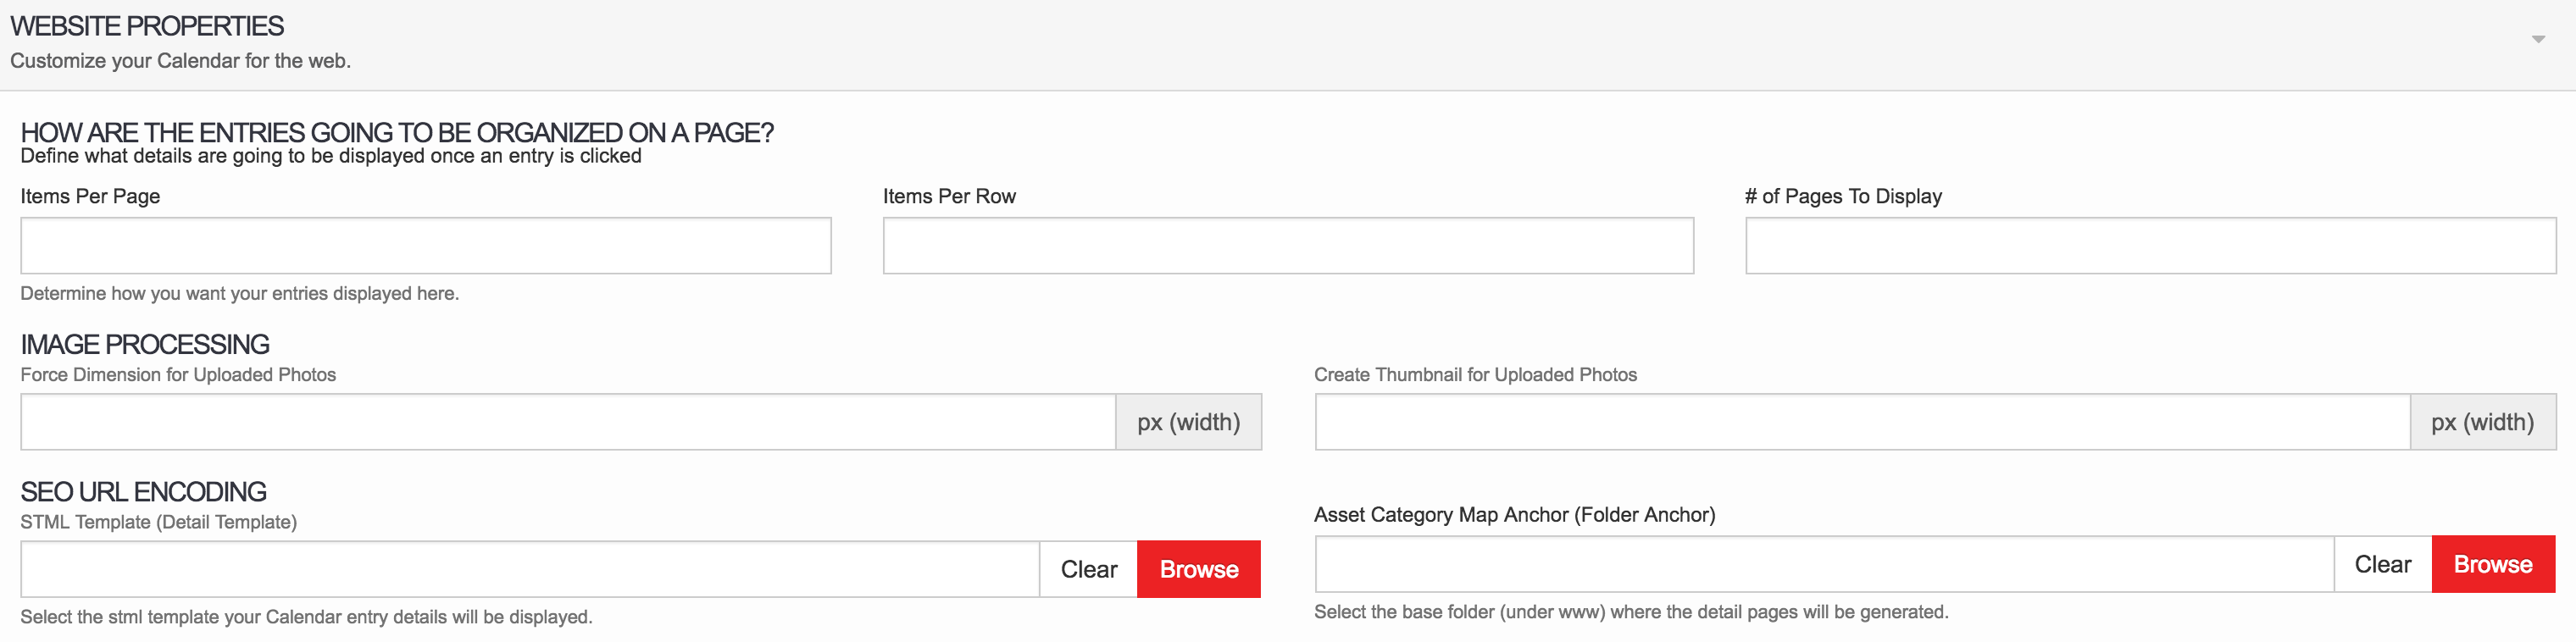
Open the client module by selecting it from the left hand file tree. Click the Modify button. Open the Website Properties tab. Scroll down until you see the SEO URL Encoding field and click Browse. Select the page containing your detail template. Click Ok.
Step 2 - Select your Asset Category Map Anchor
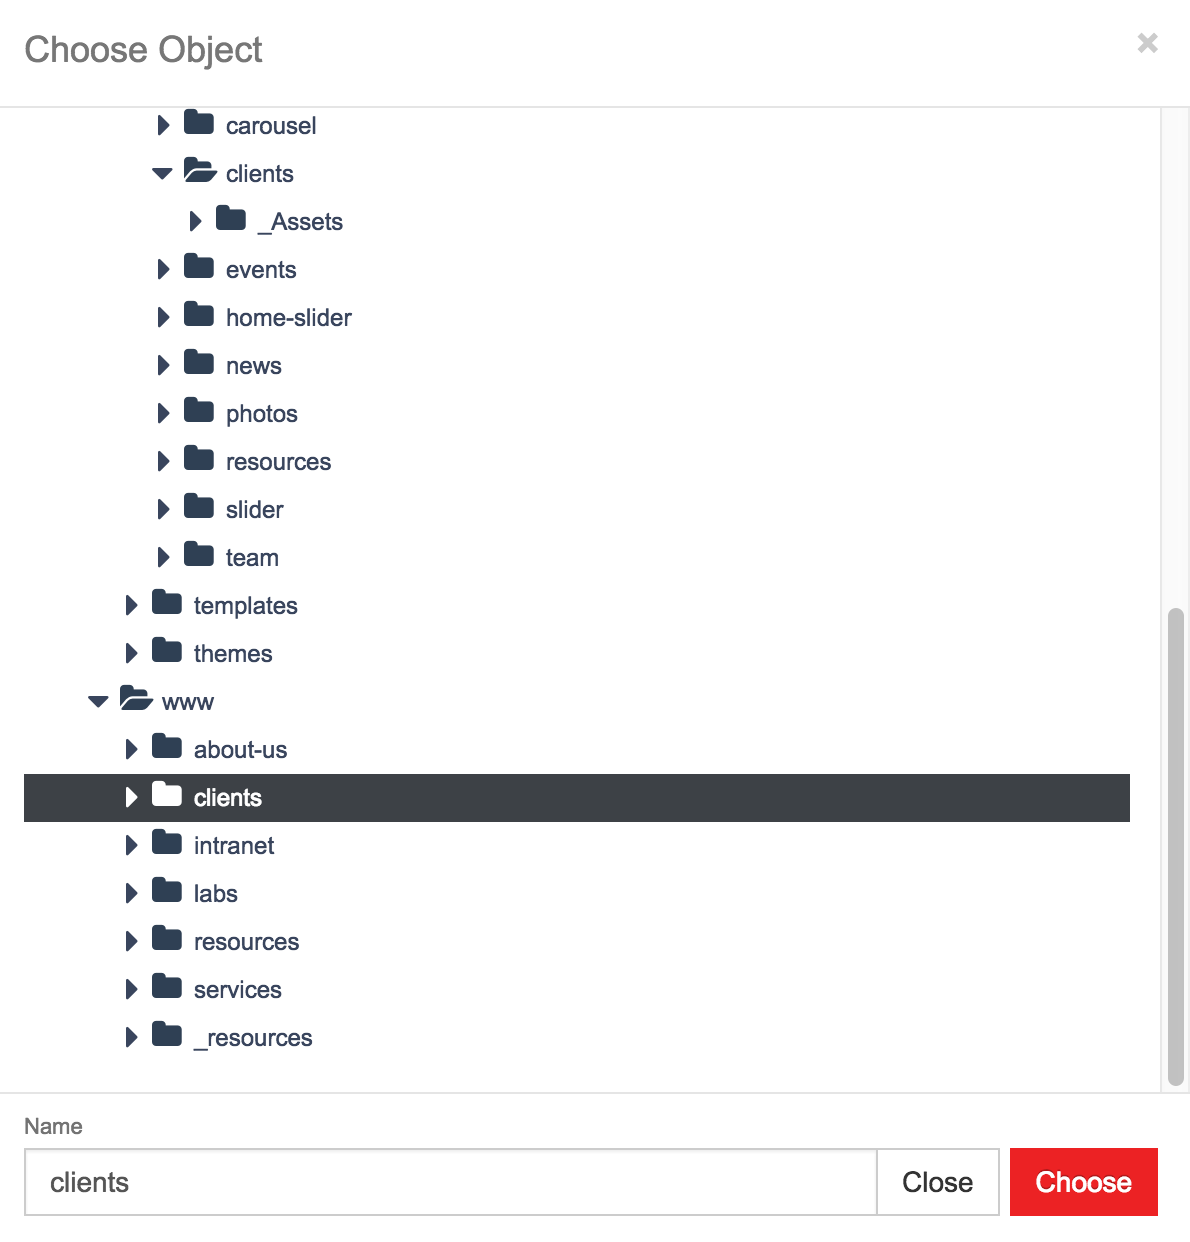
Next to the SEO URL Encoding Input Field is the Asset Category Map Anchor (Folder Anchor) field. Click Browse and a new modal will popup displaying various folders - select the folder storing the index.stml and detail.stml pages of your module and click Ok, then click Submit in the bottom right of the page.
Step 3 - Add Entries to your Client Showcase
Add a client name, supporting text, an intro, upload a client logo, add a description and select a category for the entry.
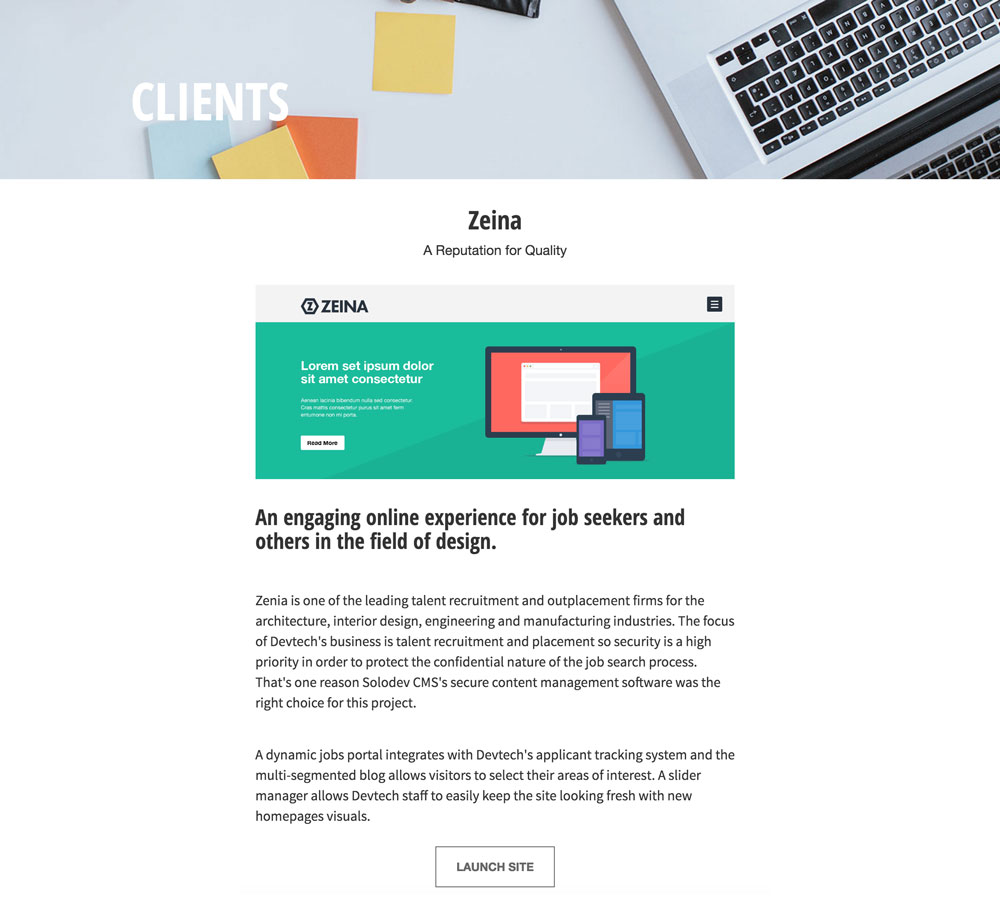
If you followed the steps above correctly and click on one of the logos on your index page, you will be redirected to the detail page of that particular client as shown below.
Congratulations! You've successfully built your first module in Solodev! To learn more about building modules in Solodev, check out our in-depth documentation!
Learn More
Matthieu McClintock
Contributions Editor here at Solodev. Want to be featured on the Solodev Blog? Get in touch.
Follow me on Twitter


