Building a Photo Gallery with Solodev
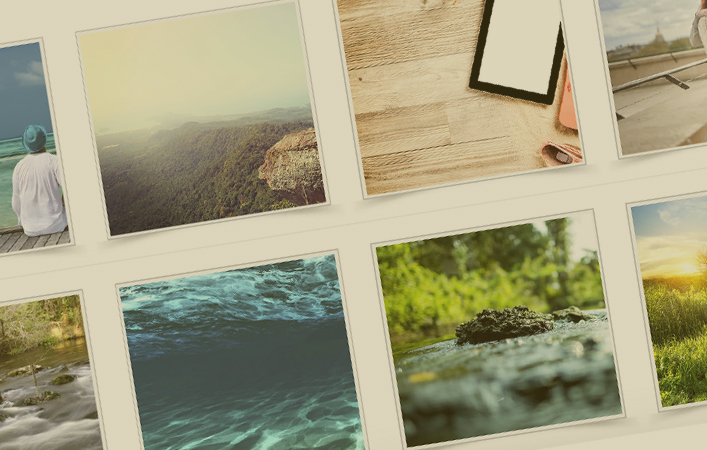
Graphics have taken on an increasingly central role to online content and the need for interactive and beautifully designed photo galleries has never been more prevalent.

Solodev Required
This tutorial covers building a photo gallery module in Solodev using shortcodes.
Graphics have taken on an increasingly central role to online content and the need for interactive and beautifully designed photo galleries has never been more prevalent. In this article we will show you how to build a photo gallery for your website using Solodev Shortcodes.
Step 1 - Create your Photo Gallery Module
Open the folder to which you want to add your client module. Hover over the Add button and select Calendar.
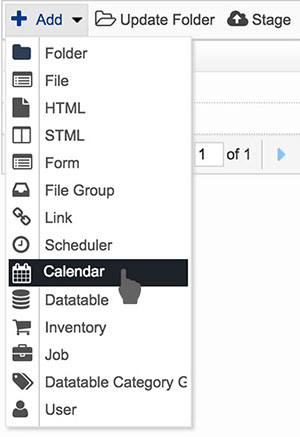
For enterprise users, we suggest creating your modules inside your "Data Center" directory.
Step 2 - Upload your Photo Gallery Form
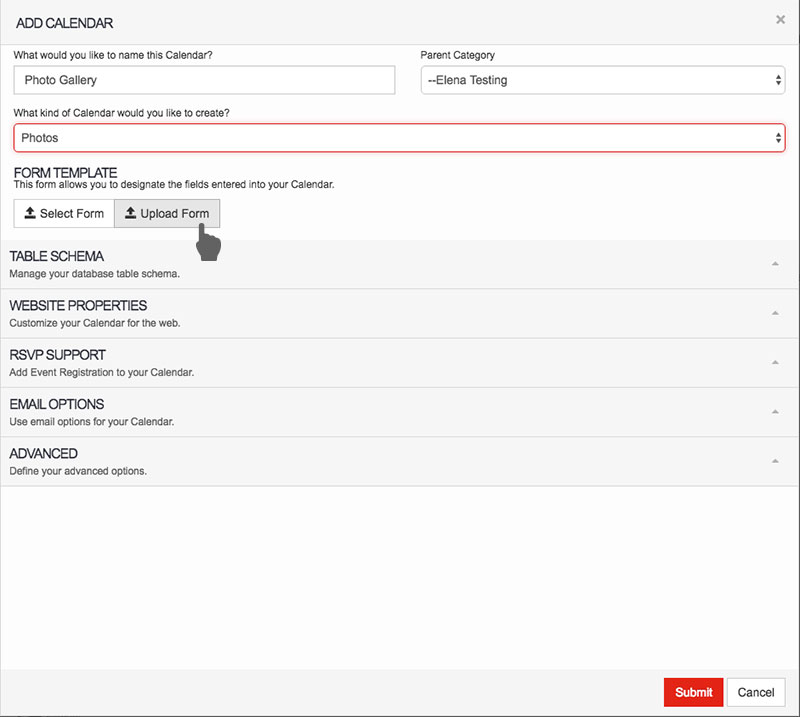
The code below will add the appropriate fields to your photo gallery module. First you will need to save this code to your computer as a simple text document with .tpl at the end of the file name such as "photo-gallery-form.tpl".
Step 3
Click on Upload Form and select the file you just saved.
Step 4
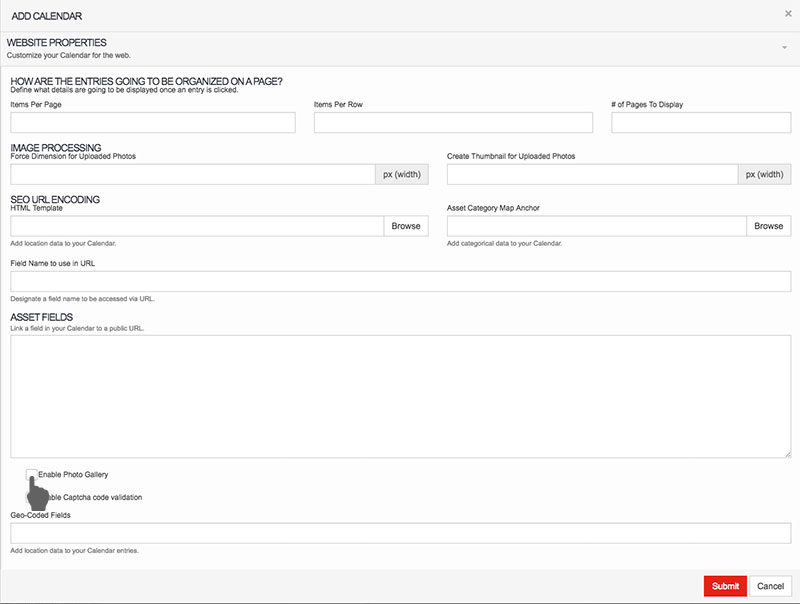
Open the Website Properties Tab and check the Enable Photo Gallery checkbox. Then click Submit.
Adding a Detail Template
Now that we have created a photo calendar, we need a place to display it. We need to do that by creating a detail template, adding it to an STML page, and modifying our Photo Gallery module.
Step 5 - Copy and paste the code below into a new file called detail.tpl inside your module folder
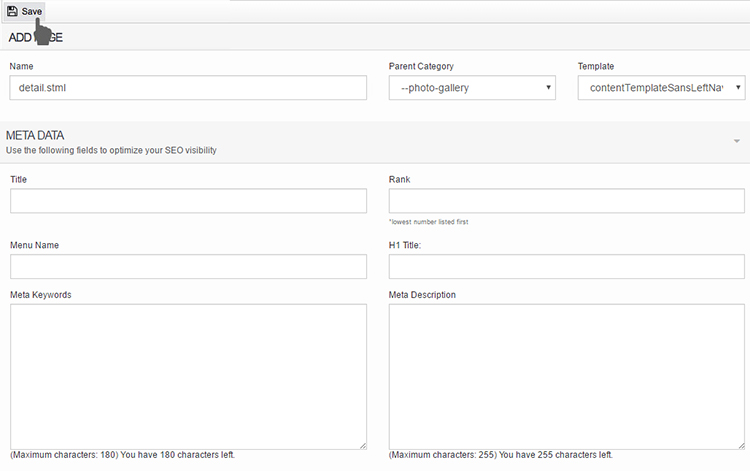
Step 6 - Add an index.stml page to place your detail
We need to create an STML to include our detail. On the www folder, create a folder for the Photo Gallery and click Add->STML from the Actions Menu. Name your file detail.stml and choose a template from the template dropdown. Click Save to submit the changes.
Step 7 - Add your detail template to index.stml
Click on a Dynamic Div and click on your detail.tpl file from the left nav to add it to the stml. Click Publish.

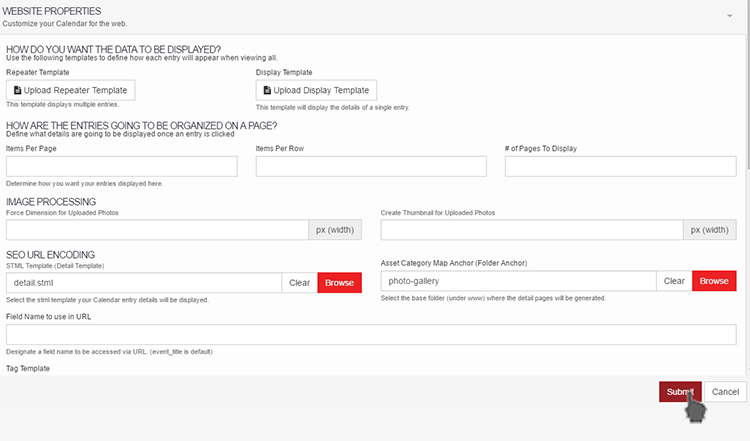
Step 8 - Update your Photo Gallery Calendar to reference the new detail.stml page
We need to update the gallery calendar so that it can reference the detail.stml page created in the above step. Navigate to your calendar and click on the modify button. The "Update Calendar" screen will appear and open up the Website Properties tab. Enter the "STML Template (Detail Template)" field with the actual detail.stml file you just created and enter the "Asset Category Map Anchor (Folder Anchor)" with the parent folder of that detail.stml. Click the "Submit" button when those fields are populated.
Step 9 - Add your entries
Now that you have created your module and the detail page for it to display your photos, it is time to add your photos to the module. Go to your Photo Gallery Calendar and from the Actions Menu select Add Entry.

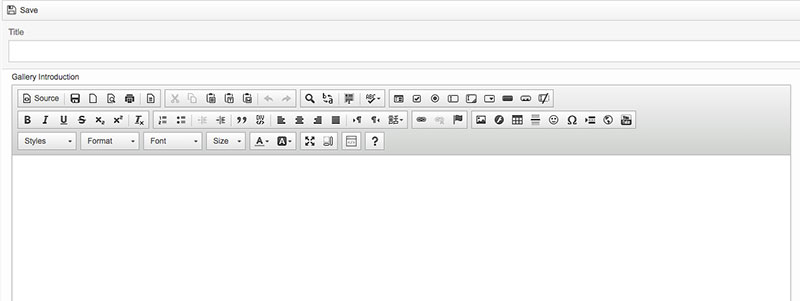
Step 10 - Fill out your form fields
Add a Title and fill the rest of the fields, i.e. Introduction, Gallery Image, Gallery Image Description. Click "Save" when done.
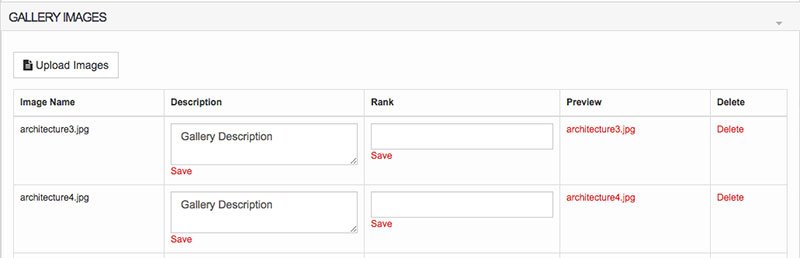
Step 11 - Add images to your photo gallery
Saving your entry is going to enable the Gallery images and Comments tabs. To add images to your gallery, click on the Gallery Images accordion tab and start uploading your images. You can upload as many images as you want at the same time. After uploading them, the page is going to refresh. You can go back to the Gallery Images tab and add a Description and Rank your photos, as well as previewing or deleting them and uploading more images. Click Save.
After adding a few entries, this is how the calendar grid should look like.
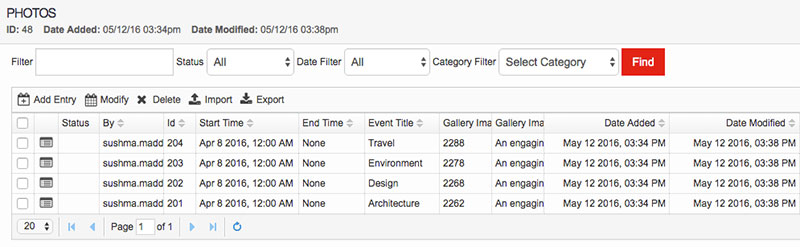
NOTE: The URL for each entry is dependent upon (1) the name of the entry and (2) the "Asset Category Map Anchor" defined in Step 8. For example, the entries above would have the URL of "yourwebsite.com/photo-gallery/travel.stml", "yourwebsite.com/photo-gallery/environment.stml", "yourwebsite.com/photo-gallery/design.stml", and "yourwebsite.com/photo-gallery/architecture.stml".
Step 12 - Add the CSS below to your website's main stylesheet
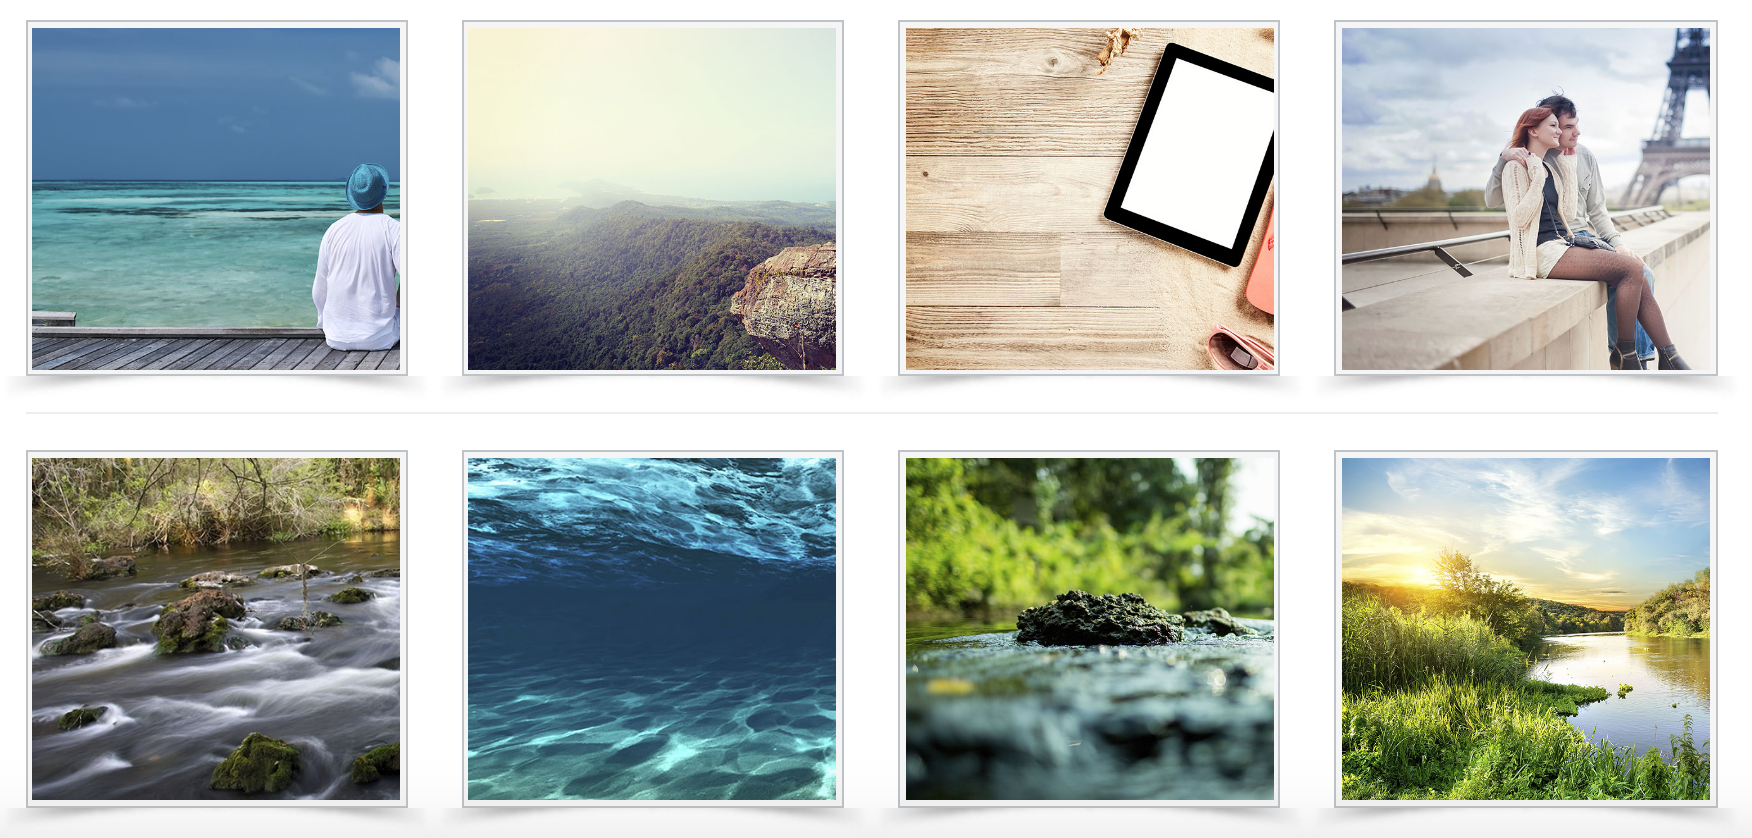
If you followed the steps above correctly, your photo gallery should appear as it does below.
Congratulations! You've successfully built your first module in Solodev! To learn more about building modules in Solodev, check out our in-depth documentation!
Learn More
Matthieu McClintock
Contributions Editor here at Solodev. Want to be featured on the Solodev Blog? Get in touch.
Follow me on Twitter


