Adding a Contact Form in Solodev
A contact form occupies that top-tier, priority list of web elements your website needs. With Solodev, it's a simple process to add one to your website.

A contact form occupies that top-tier, priority list of web elements your website needs. Without one, you severely limit your ability to collect valuable user data and interact with your intended audience.
Generally speaking, you will want to create a Contact form of some variety in order to receive user data. Contact forms can be as complex or simple as you want them to be. At their core, however, contact forms simply require a name and a piece of contact information (likely an email address).
The following steps will create a simple, generic contact form for you to display on your Solodev website. You can customize the form template to include the fields necessary to your business or website.
Step 1 - Add a Datatable
When creating a Contact form, you first want to create a datatable to store all of the user submitted information. This datatable will simultaneously act as the front-end from, inserted into a page via a Dynamic Div.
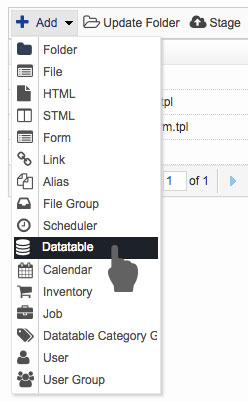
Open the folder to which you want to add the datatable by selecting it from the left hand file tree. Hover over the Add button and click Datatable.
Step 2 - Designate the Datatable as a Form
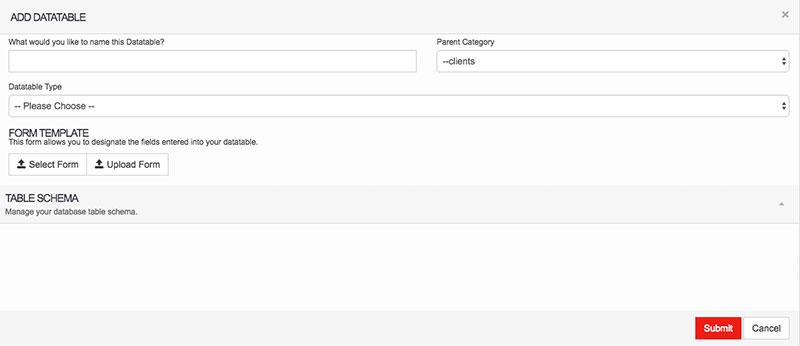
Type in the name of your new datatable (e.g. "Contact Form") and designate the type of the datatable as Form.
Step 3 - Upload a Form Template
First create a form template and save it your local machine. The following is a code sample for your template. Copy it and save it as "form-template.tpl".
Below is an example of a sample Form Template used to collect information from visitors to a website.
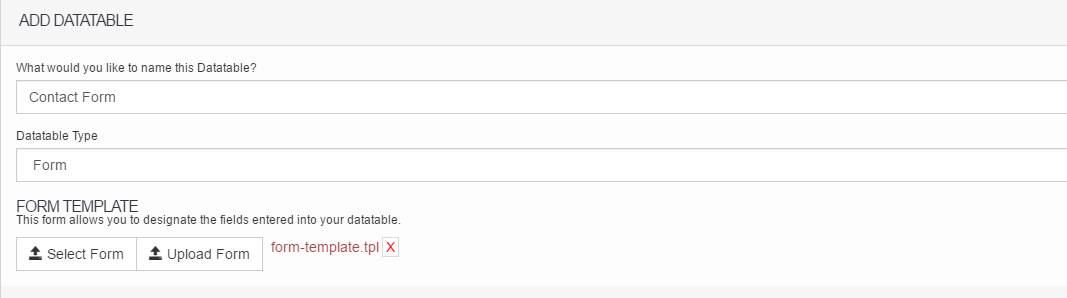
Click on the "Upload Form" option under the "Form Template" section. Browse your computer for your form template. Once it is uploaded, it should look like the following image. Click Submit to create your new datatable.
The datatable for your Contact form should now exist.

Step 3 - Navigate to Your Contact Page
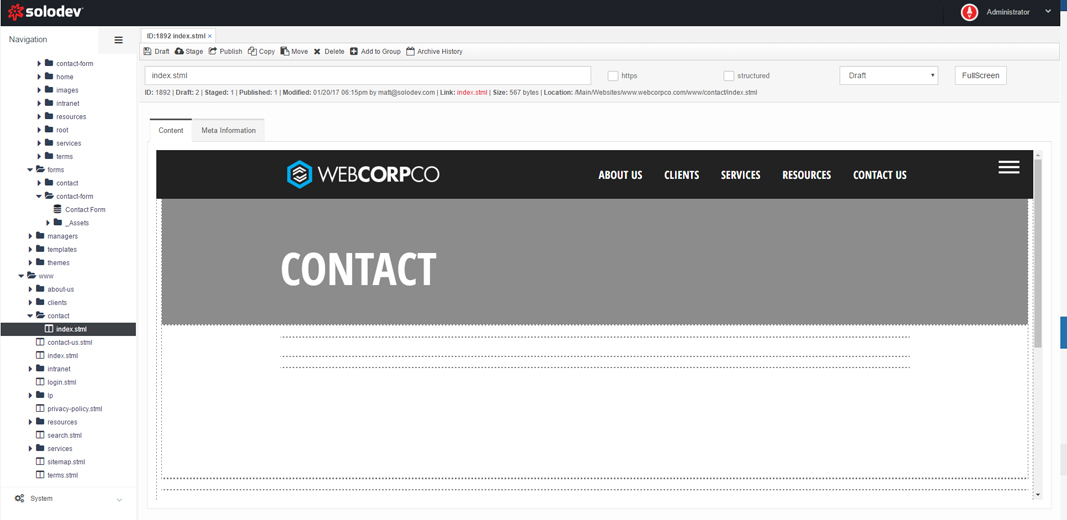
Find the page you want to add the Contact form and click on it in the left-navigation.
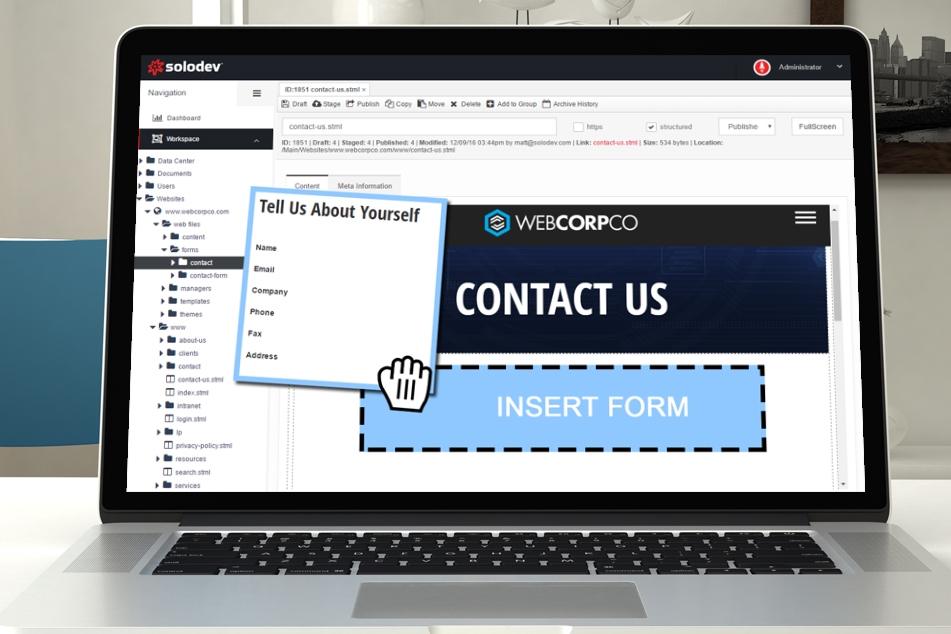
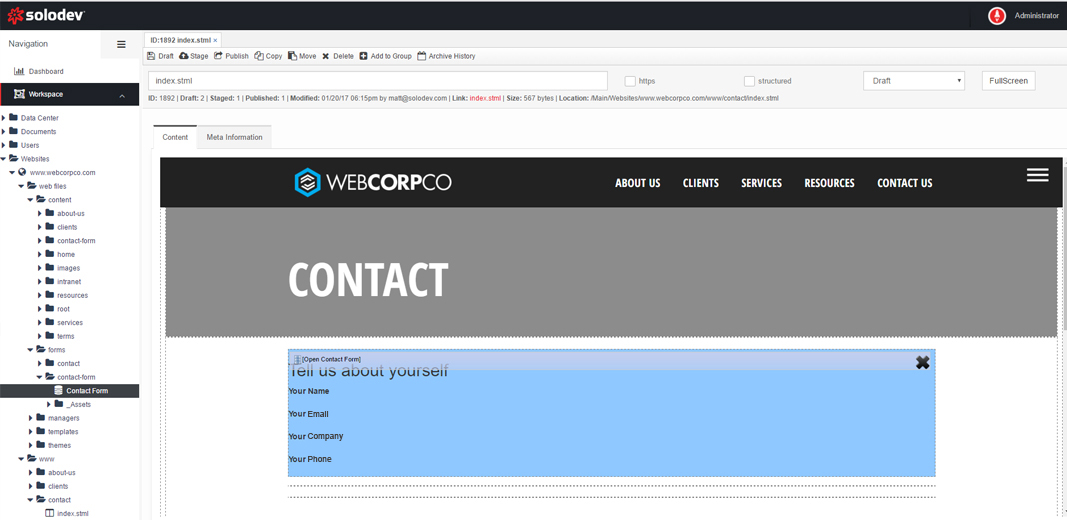
Step 4 - Insert the Contact Form Datatable
Highlight the Dynamic Div within the page where you want to insert your Contact Form. In the left-navigation, find the Contact Form datatable you just created and click on it to insert it into the page. Once your form is in place, click Publish to save the page.
Step 5 - Confirm & Test
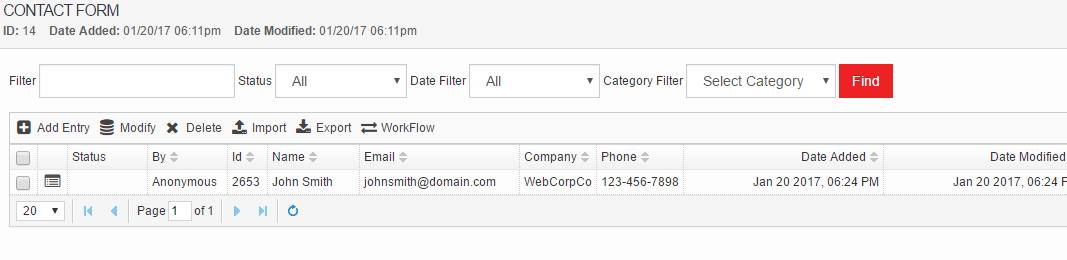
Navigate to your contact page on the front-end to make sure everything is styled correctly. Fill in the form fields to test.

Hit the Submit button to test the form's functionality. If everything is working correctly, the data should now be saved in your form's datatable.
To learn more about forms, visit Solodev's documentation. The "Forms" section covers using forms in Solodev to build datatables, calendars, and front-end contact forms.

Matthieu McClintock
Contributions Editor here at Solodev. Want to be featured on the Solodev Blog? Get in touch.
Follow me on Twitter


