How to Filter IP Addresses in Google Analytics
A fundamental necessity is being able to trust the accuracy of your Google Analytics data. One way to help achieve this is to filter out your internal traffic to prevent the skewing of your metrics.

In a rapidly evolving digital space, your data's accuracy is massively important. Part of ensuring your data stays as up-to-date as possible comes from making sure your own organization doesn't skew the numbers. An effective tool to help with that is Google Analytics. Google Analytics is one of the most powerful tools in tracking how your potential customers engage with your website.
However, when Analytics reports have both internal and external visitors to your website, it can get confusing to pull out an accurate read of your customer's traffic. Without a solid understanding of your potential customers' routes and interests, your marketing team will have less data on how to concentrate its marketing efforts.
This tutorial will walk you through easy ways to filter IP addresses using Google Analytics to ensure your website data remains accurate.
Excluding Single IP Addresses
1) Firstly, sign on to your Google Analytics account and click on the Gear Admin Button in the lower left corner:

2) Next you’ll be at a screen showing a lot of Google Analytics options. The tool you’ll want here is the “All Filters” button (Highlighted Below).
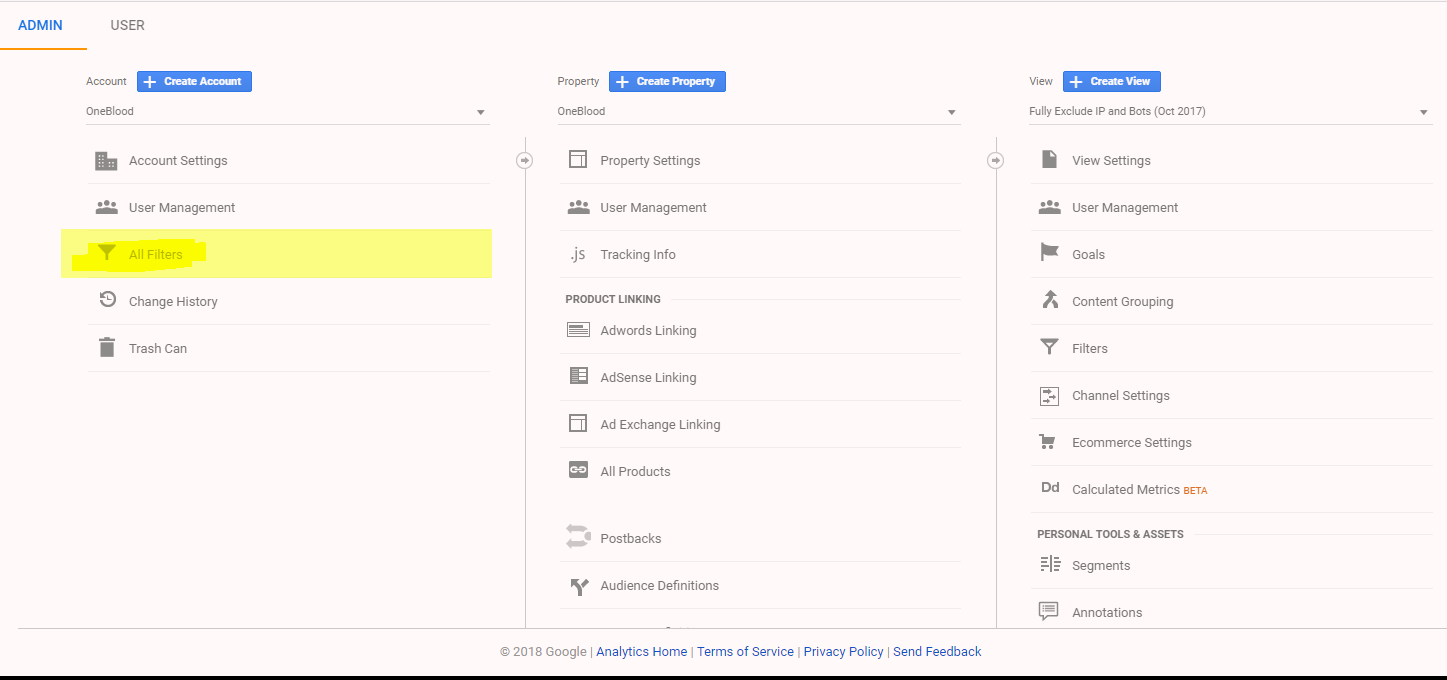
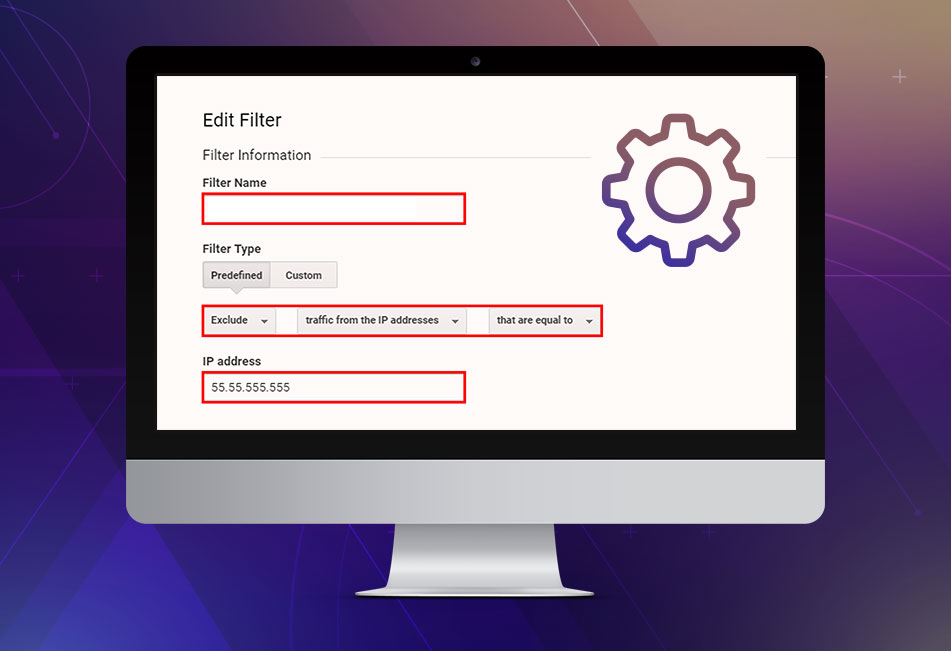
Click on this, then click on the Add a Filter button. You’ll be prompted with a small form with some of the information. Give the filter a relevant name, such as Company Internal IP Address. The type is Predefined. You’ll want to select: Exclude | Traffic from the IP Addresses | That are equal to in the three boxes:

3) Lastly, select the view in which you want to apply this filter to and save. The final UI should look something like this:

Excluding Ranges IP Addresses
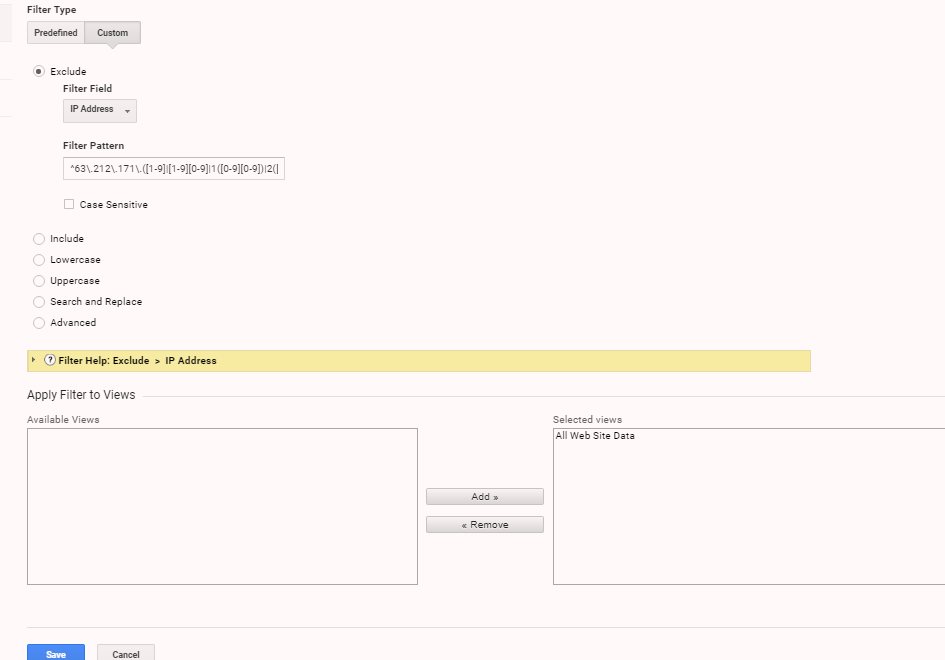
1) This process is very similar to the one above. The only difference here will rely on the Filter Type. Opposed to the predefined filter, you’ll want to select Custom. From here, click Exclude, then select IP Address for the Filter field Selector.
2)Opposed to a single IP address, you’ll want to exclude a Regular Expression (Regex) of the pattern of IP addresses in which you wish to exclude. If Regex’s are a bit intimidating, this tool provides a simply way to get the correct range http://www.analyticsmarket.com/freetools/ipregex. Feel free to ignore case sensitivity since we are only dealing with numbers.
3) Lastly, select the views you wish to apply to again. Final UI should look like this:
Using the Right View with your Filters
In the examples above, the IP filtering has been applied to the default "All Web Site Data". One issue that can arise is when members of your internal organization need to test various goal conversions, funnels, or other metrics. With the filter in place, none your tests will be registered.
The best way to combat this problem is to create two (or more) views, one that tracks all website traffic regardless of IP filtering and one view that tracks only external traffic.
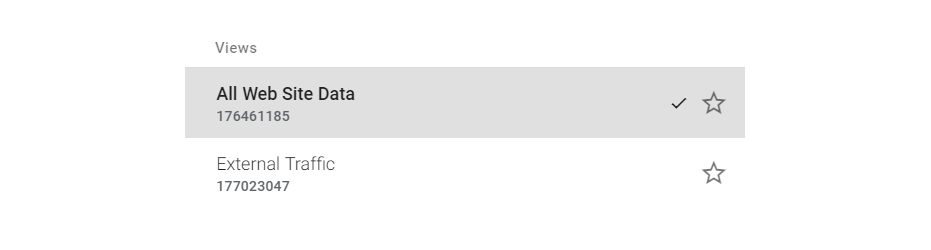
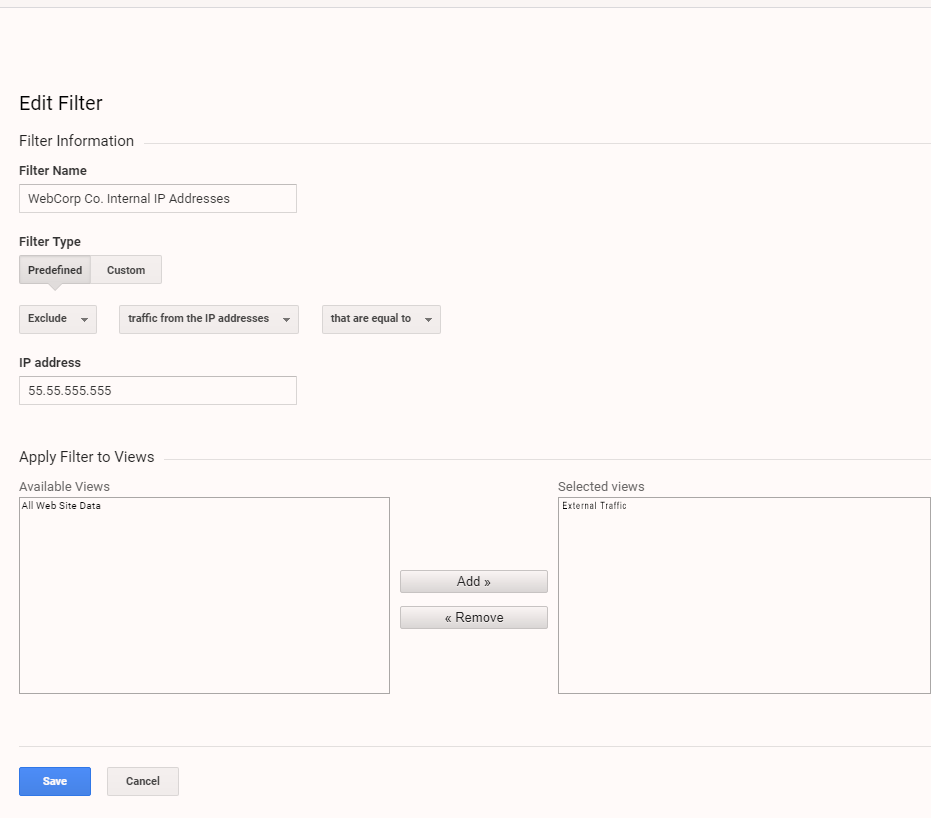
When these two views, you can now apply the IP filtering to exclusively the "External Traffic" view. The filter itself would then look like something below.
Now, if you need to test various tracking metrics within Analytics, you can do so under the "All Web Site Data" view whereas all of your accurate reporting can be drawn from the "External Traffic" view.
And there you have it! Now you’re Google Analytics data will be free of any nuisances, spam, or clutter from your own web interactions. Enjoy!

Scott Madara
Contributions Editor here at Solodev. Want to be featured on the Solodev Blog? Get in touch.
Follow me on Twitter


