Configuring Google Analytics Variables in Google Tag Manager
Google Tag Manager is extremely powerful. By creating custom variables that match your Google Analytics property, you will be able to take advantage of a full suite of page and event tracking.

Google Tag Manager is an indispensable tool that can help you easily manage the various scripts on your website and how they are specifically called. Naturally, one of the first scripts you will install is Google Analytics tracking code. The two elements (GA and GTM) go hand-in-hand with one another.
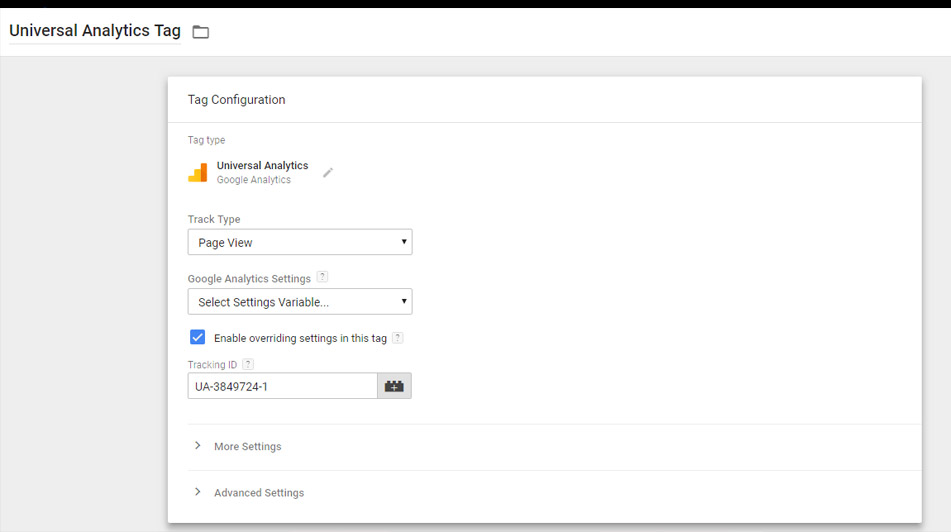
At a basic level, you can hardcode the various values into the default Google Analytics tracking tag configuration. This layout would like below:
That'll work just fine for doing the essentials, such as tracking page views. However, if you want to use Tag Manager at scale with Analytics and track all sorts of quality information, from event tracking to goal conversions, then there's an alternative: setting up custom variables.
By specifying your Google Analytics property information as a variable, you will then be able to use the same information in multiple tags. Ultimately, this makes managing your container infinitely easier and allows you to make bulk changes in the event you need to modify the Google Analytics information.
What are User-Defined Variables?
Within Tag Manager, there are two "sets" of variables: (1) built-in variables and (2) user-defined variables. The former are variables that are installed by default with the creation of a given tag container. The latter are variables that you can create and totally customize.
Variables can be used in both triggers and tags, either as a value condition for a given trigger or as the value that is passed within the tag that is fired. Within the scope of setting up Google Analytics variables, you will want to create new "user-defined" variables and then pass them along to the tag itself:

Variable Configurations
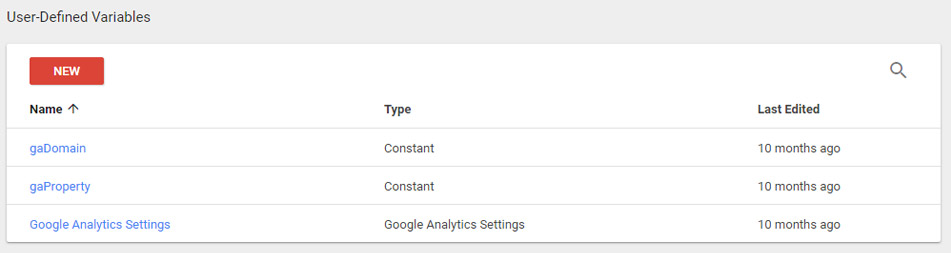
You can start by creating three specific user-defined variables
| Name | Type | Value |
|---|---|---|
| gaDomain | Constant | Auto |
| gaProperty | Constant | Your Universal Analytics ID |
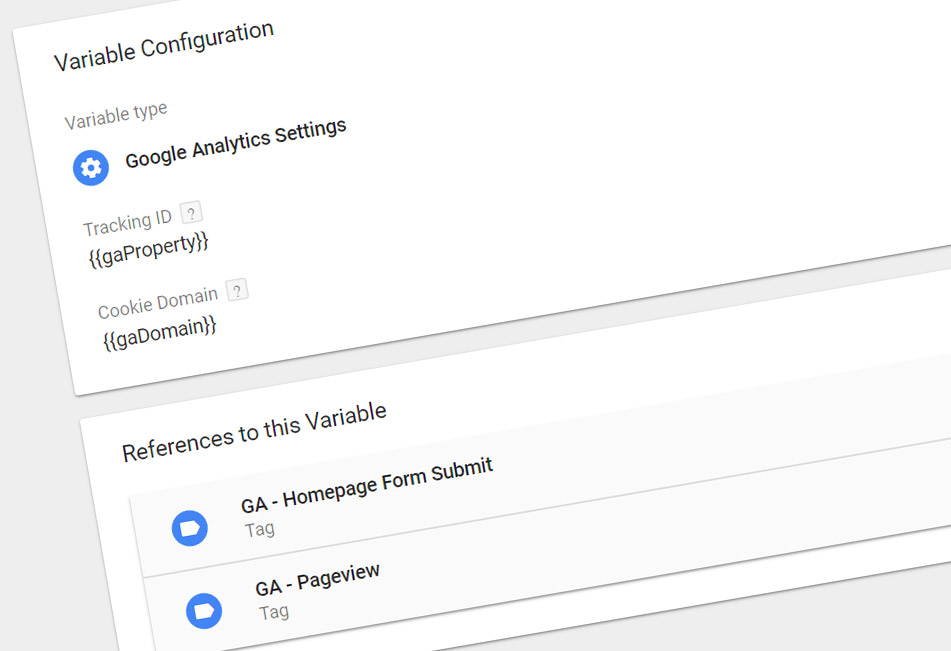
| Google Analytics Settings | Google Analytics Setting | Tracking ID: {{gaProperty}} Cookie Domain: {{gaDomain}} |
With the above values, you are essentially creating two essential variable elements (the "gaDomain" and "gaProperty" variables) that match directly to your Analytics property. The "Google Analytics Settings" variable then aggregates the two in a variable that can be utilized within your tags.
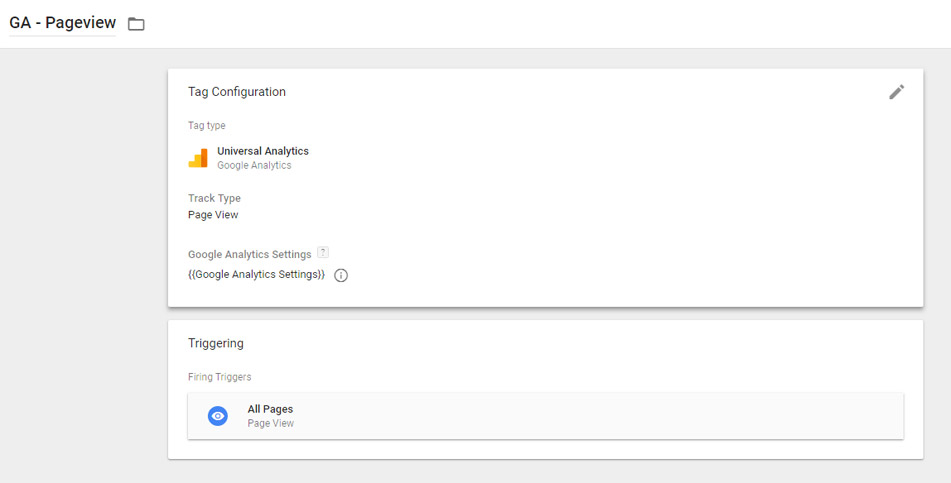
Configuring Your Page View Tag
With your variables in place, you are now ready to set up the basic page view tag. Rather than clicking on the "Enable overriding settings in this tag" checkbox and manually specifying the UA ID, you can simply use the "{{Google Analytics Settings}}" variable previously set up.
Additional Tags
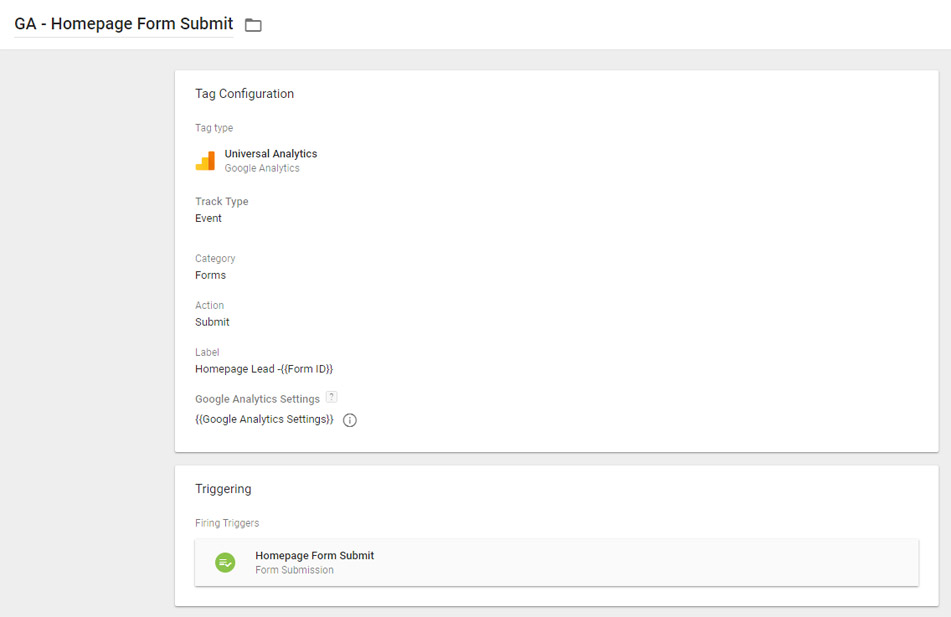
Of course, you can leverage these variables in other ways, including for event tracking. Say you want to track particular form submissions, such as form submissions on your homepage. You can use the "{{Google Analytics Settings}}" variable just like you would for page views.
Wrapping It All Up
Tag Manager variables are ultimately meant to make your life easier and make your specific container easier to manage. With Google Analytics variables, you specify values once and can then use them repeatedly in multiple scripts, tags, and events. These variables create a more robust container and allows you to take full advantage of both Analytics and Tag Manager.

Scott Madara
Contributions Editor here at Solodev. Want to be featured on the Solodev Blog? Get in touch.
Follow me on Twitter


