
Creating a Team Module with Solodev
Showcasing your team on your website adds a necessary human element to your brand. In this article we will show you the basics of creating a team module in Solodev.


Solodev Required
This tutorial covers building a team module in Solodev using shortcodes.
Showcasing your team on your website puts a face to a name and adds a human element to your brand. In this article we will show you the basics of creating a team module in Solodev using shortcodes. An advanced version of this tutorial will be available in the coming weeks.
Step 1 - Create your Team Module
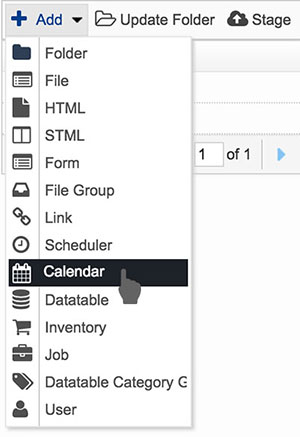
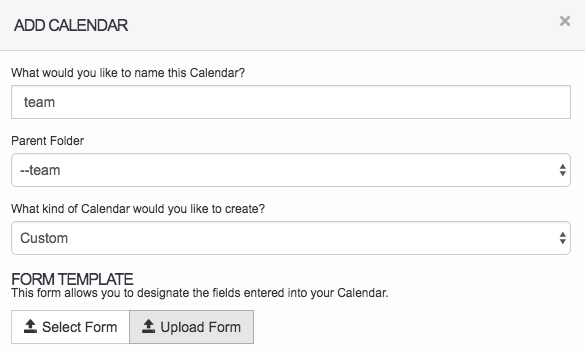
Open the folder to which you want to add your team module. Hover over the Add button and select Calendar.
For enterprise users, we suggest creating your modules inside your "Data Center" directory.
Step 2 - Upload your Team Form
Copy and paste the code found at the link below to a simple text document with .tpl at the end of the file name such as "team-form.tpl".
team-form.tplClick on Upload Form and select the file you just saved. Then click Submit.
Step 3 - Create your Repeater Template
Copy and paste the code found at the link below to a simple text document with .tpl at the end of the file name such as team-repeater.tpl inside your module folder
team-repeater.tplrepeater id="" limit="0,9" type="calendar"
The repeater id="" needs the ID of the blog module. Open the blog module and look for the ID at the top left under the name of the module. Place the ID number inside the quotes ("").
The image below outlines where to find the ID of the module.
Step 4 - Style your Team Module
Download the file below and copy and paste the CSS into the main stylesheet of your website
team.cssStep 5 - Add entries to your module
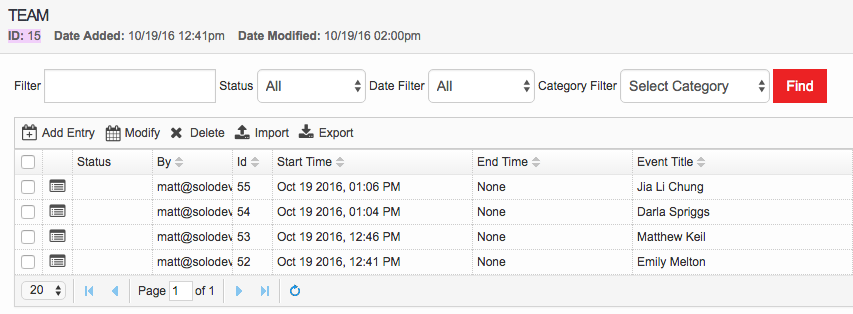
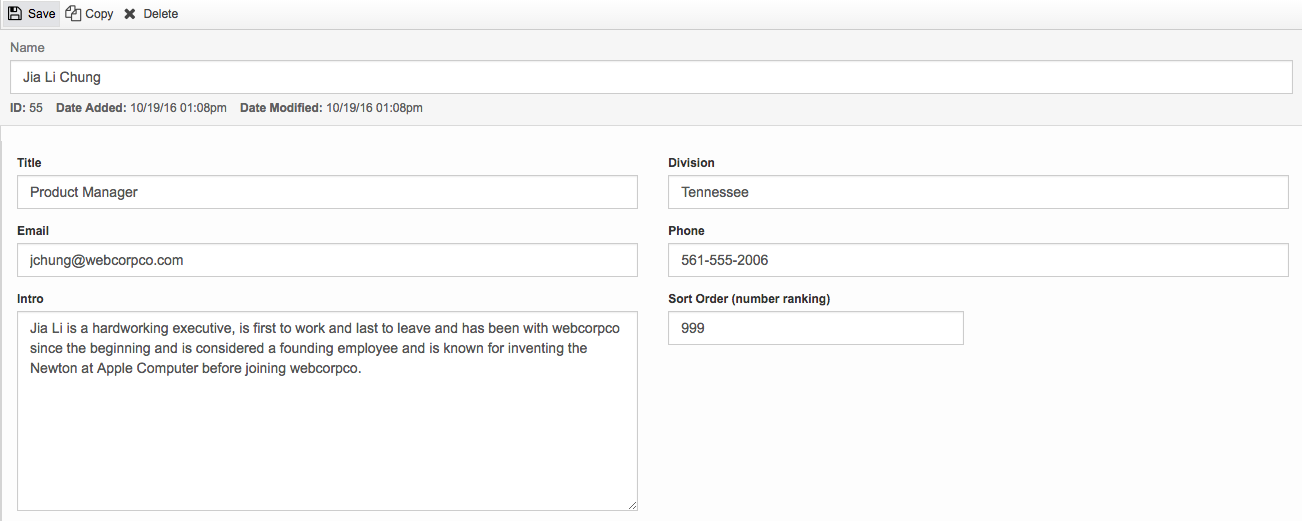
Now that you have created the team module it's time to add team entries. Open your team module and click Add Entry as shown below.
Fill out your form fields (created when you uploaded your form) and click Save.
Step 6 - Add your repeater template to an STML (Web Page)
Click Add->STML, name your page, select its parent folder and template. Click Save.

Navigate to the repeater file in the left tree and select the dynamic div on your new web page and click on the repeater file as shown below.
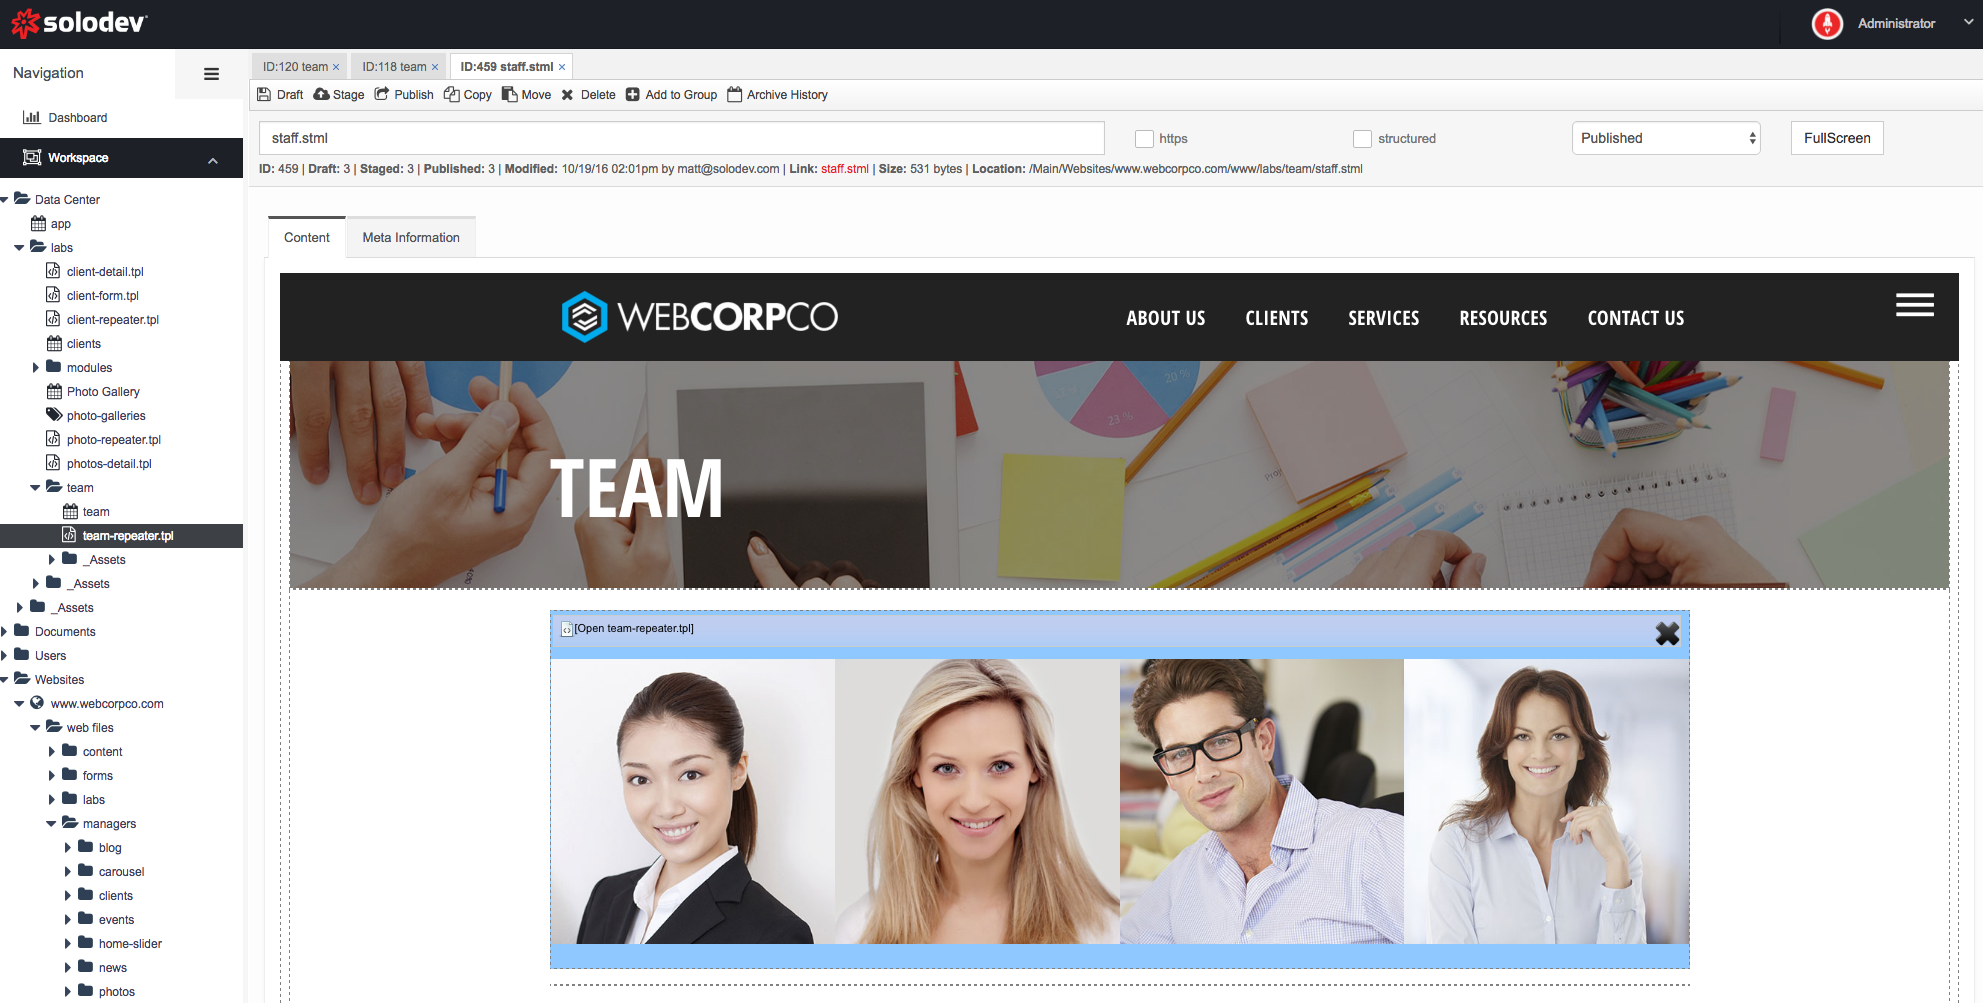
If you followed the steps above correctly your team page should appear as shown below.

Congratulations! You've successfully built your first module in Solodev! To learn more about building modules in Solodev, check out our in-depth documentation!
Learn More
Matthieu McClintock
Contributions Editor here at Solodev. Want to be featured on the Solodev Blog? Get in touch.
Follow me on Twitter


