An Overview of User Permissions in Solodev
Permissions is one of the most critical components to your CMS. With Solodev, your team is equipped to give content creation permissions only to those who need it. Read on to discover what other benefits permissioning has.

User permissioning is a critical part of any CMS -- especially if your organization has a large content team.
Permissioning, for example, can ensure that your copywriting intern doesn't delete or modify a critical element on your website. Some CMS systems are better at permissions than others, but Solodev was created with extensive user permissioning in mind.
Our permissions are incredibly granular, giving a website administrator full sight of everything they need to see. Lower-level content editors only get access to what they need.
Want to know how configure permissions on the Solodev CMS? Here's your guide:
Overview of Solodev Permissions
At its core, Solodev allows you to permission both access to areas in the CMS and actions a given user can do with their specified access. Further, you can assign permissions to a user group or to individual users.
This ultimately gives you extremely granular control over users within Solodev. Users can have full access to all components in the CMS, just see specific items that relate to their daily workflows, or any combination in between.
Setting Up User Groups
Before adding users and setting up permissions, however, do give some thought regarding how you want to organize users within your specific organization. Being able to group like users together into "user groups" will allow you to considerably extend the functionality of Solodev. Consider the type of users you need to add, what actions and content they will interface with on a regular basis, and what sort of actions you want them to be able to undertake. For example, you may organize your organizations similar to below:
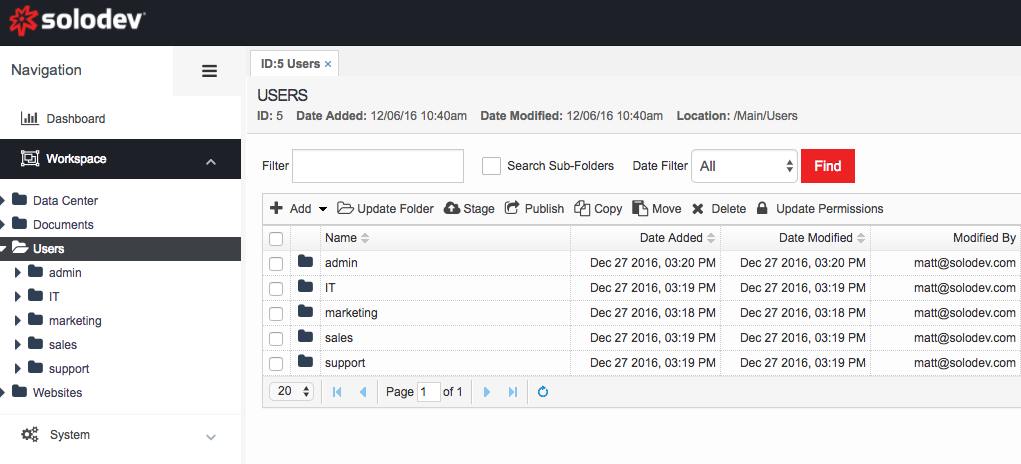
Setting up these sort of user groups will allow you to quickly add users within each group, with that user thus inheriting the permissions associated with the larger group. It's important to note that user groups are simply folders that you add within the "Users" section of the CMS and that you can create any number of user groups that meet your organization's need.
Configuring Permissions
It may be helpful to consider that permissions in Solodev work where you select an area of the CMS, select a user group you want to assign access to, and then configure that level of access. With this setup, you can grant a user group permissions to any specific element of the CMS. Does your marketing team just need to see the blog content? Does your sales team just need access to your pricing pages? Does technical support need access to the vast majority of the CMS? By assigning specific sections of the CMS TO a given user or user group, you can make these types of granular decisions and help improve your organizations workflow.
To assign a section in the CMS to a specific user or user group, first navigate to that folder, open it in the workspace, and click on "Update Permissions":
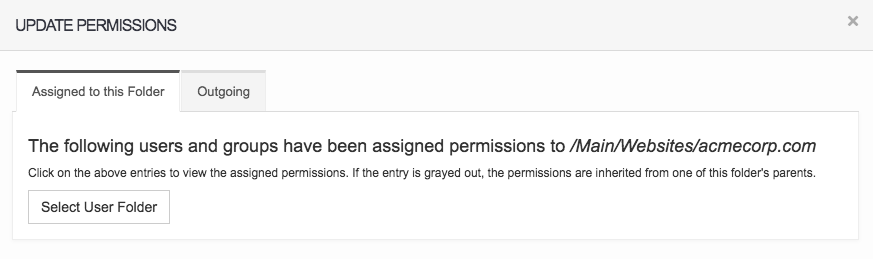
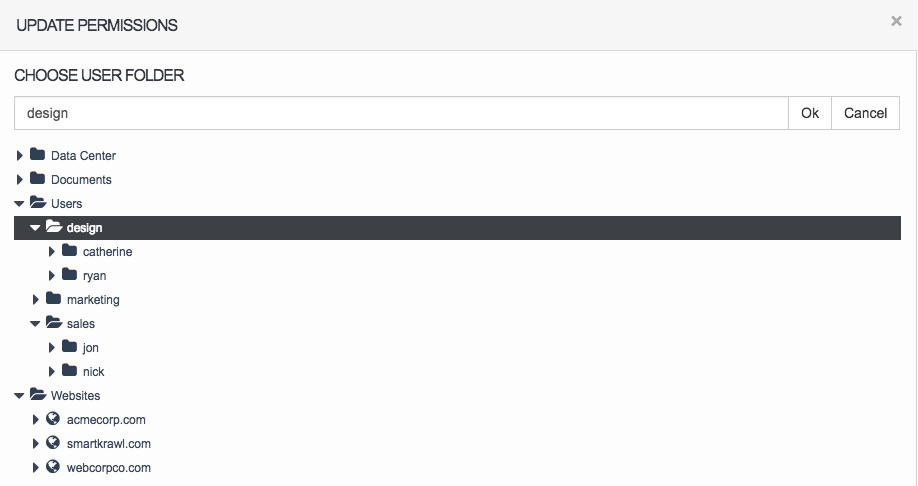
The "Update Permissions" modal will now appear. Under the "Assigned to this Folder", click on the "Select User Folder" button. You will now select that specific user or user group you want to grant access to. Once selected, click on the "Ok" button:
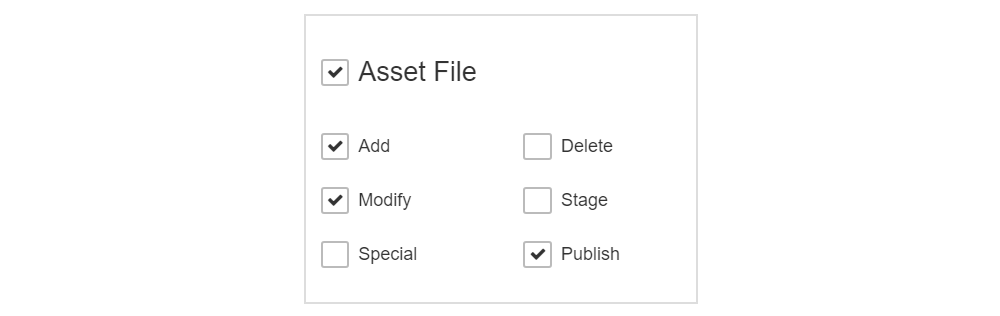
A list of "objects" and actions associated with each of those objects will now appear:

With Solodev's inherent granular control, you can specify what object a user or user group can see and what level of action they can perform. For example, you can configure it so that a user or user group can only "Add", "Modify", and "Publish" files but not "Delete" files. This ultimately gives you full control over your user's experience in the CMS and can significantly. Such a configuration would like below:
By configuring each object in a similar fashion, you can fully partition to the CMS based upon specified user roles. Of course, you don't have to be quite as granular and can grant fuller access at higher levels (such as granting a user group full access to the Data Center or to Web Files for example.
Check out our full documentation on permissions to learn more about one of the unique components to Solodev that helps organizations get the most out of their CMS experience.

Scott Madara
Contributions Editor here at Solodev. Want to be featured on the Solodev Blog? Get in touch.
Follow me on Twitter


