Understanding User Permissions in Solodev
User permissions ensure that the right members of your team have appropriate access to content, video, images, and ultimately your website.


"Teamwork makes the dream work," and that's especially true when it comes to how your team helps develop your organization's website. At Solodev, we get that. That's why we designed our CMS platform to include a user permissioning system -- ensuring that the right members of your team contribute their parts to your website.
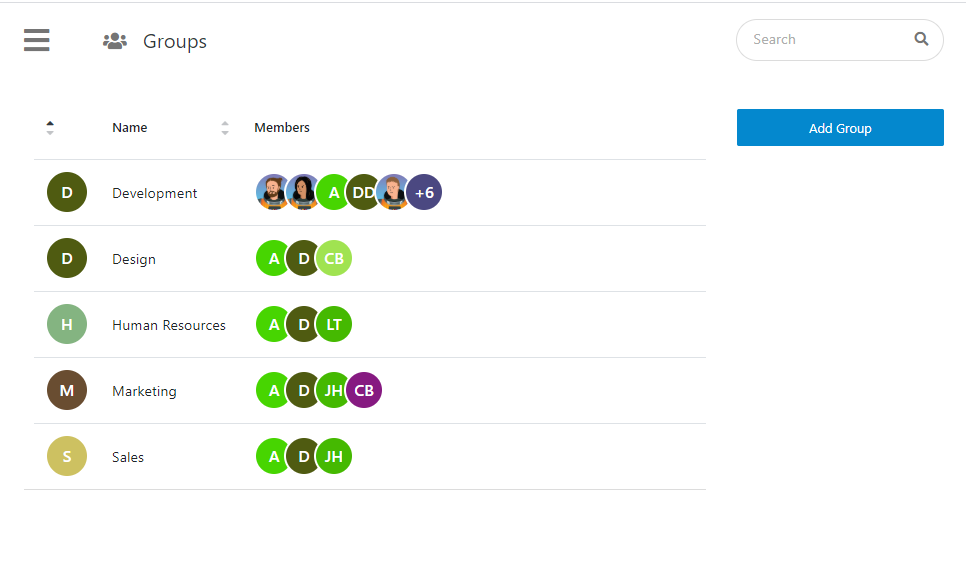
When you have a team, Solodev allows you to add not only your team members as individuals but you can also group these team members in groups such as marketing, design, development, etc. You can mimic the very structure in your organizations inside the Solodev environment and assign users and groups to specific objects or tasks by granting them granular permissions. Users are the people who have the authorization to access and interact with Solodev’s resources. Administrators can assign users to groups based on specific criteria – harnessing the power of granular permissions. In this post, we will show you how an administrator can assign permissions to groups before assigning users and groups to specific ‘Actions’ and ‘Resources’ in the Solodev CMS system.
Permissions in Action
User Permissions
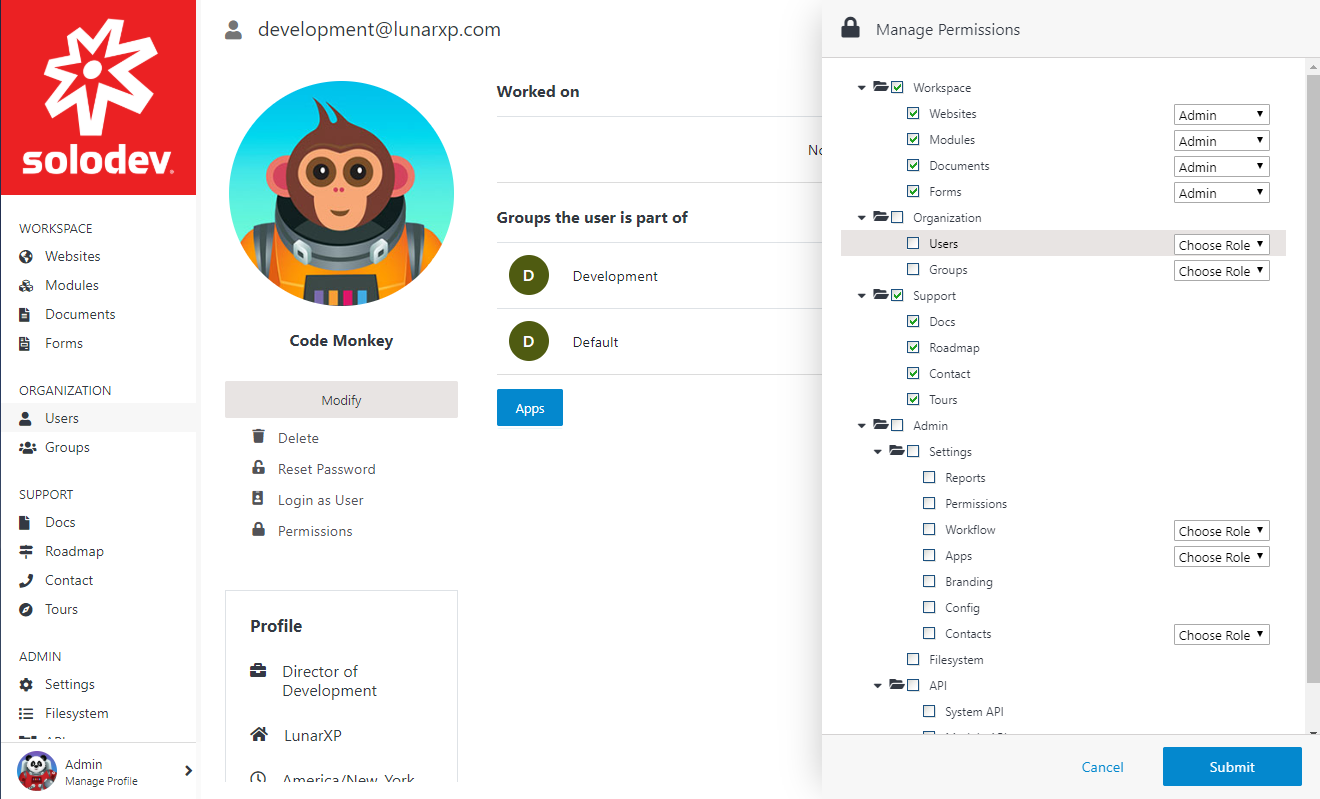
In the examples below, the user has been given administrative permissions for Websites, Modules, and Documents as well as view permissions for all Support sections. As a result, the user will have access to the following Dashboard that allows them to access Websites, Modules, Documents and all Support sections.
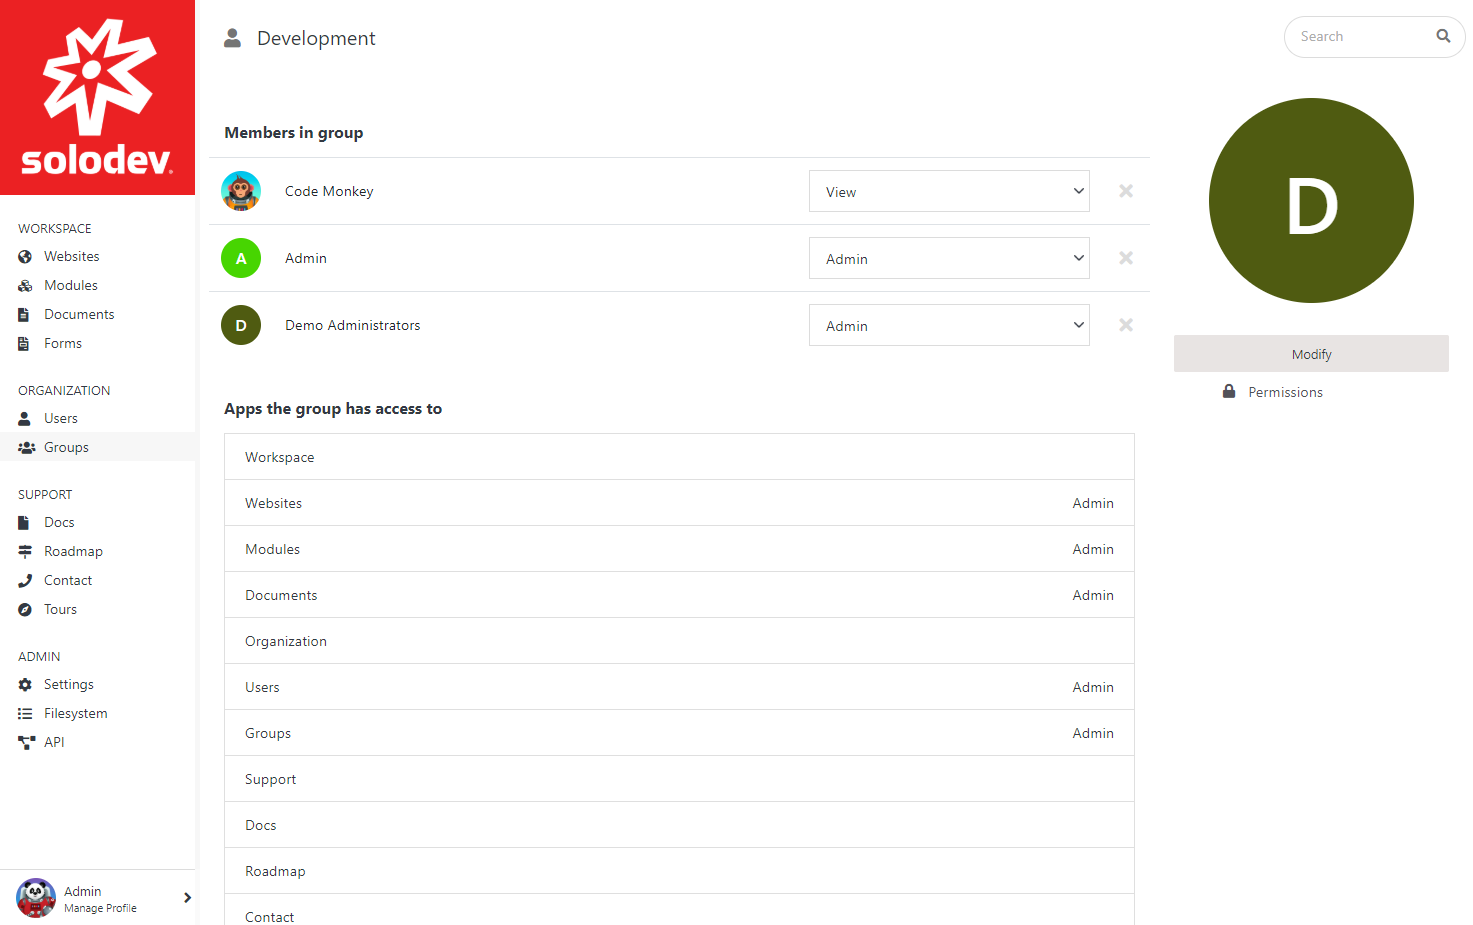
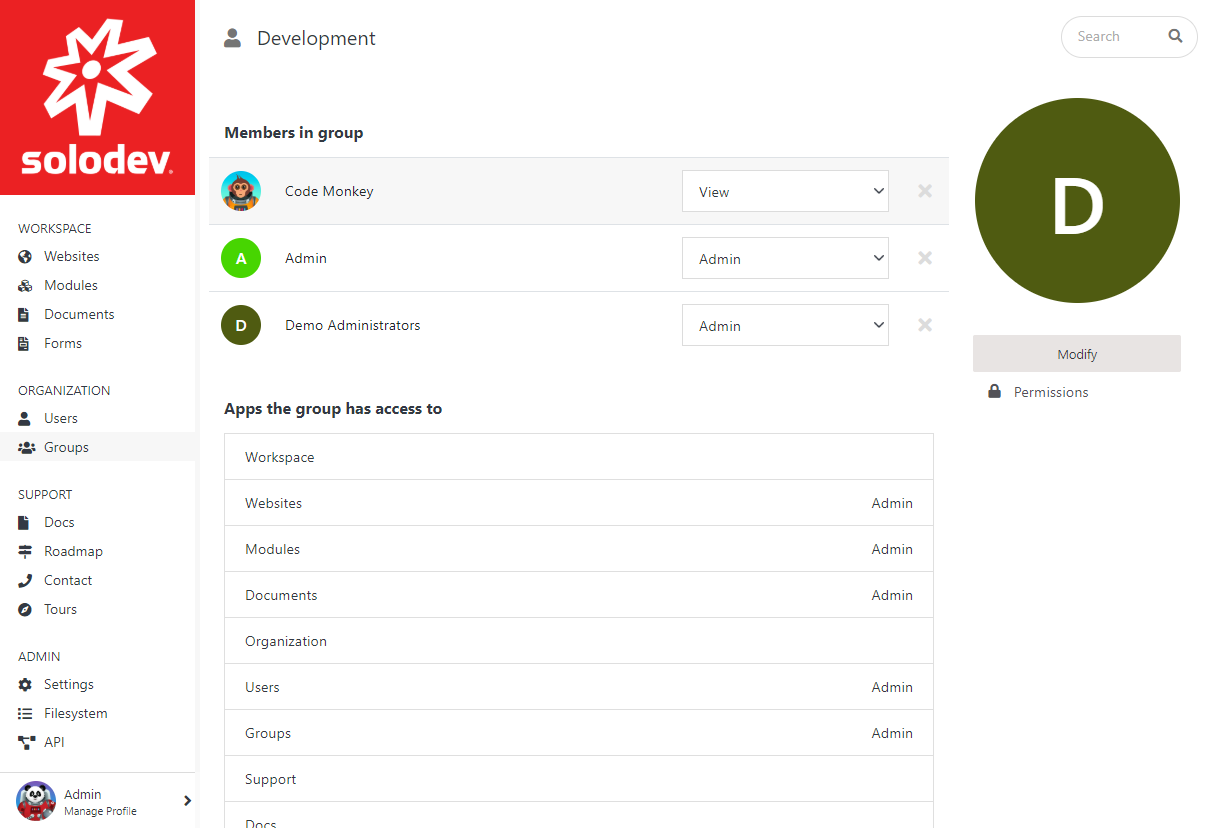
While you can manage permissions for each user, using groups to organize permissions will make the process easier and less complicated. When you set permissions for one group, the permissions that you set will be applied to all the members of that group without having to go through each user one by one and adjusting their permission settings. Below, we have a group called "Development". The group page shows all the members in that group, the Apps the groups have access to, a Modify button that allows you to edit the name, purpose, and image of the group and a Permissions button that sets whether the group members can only view, edit or become admins of that group.
Group Permissions
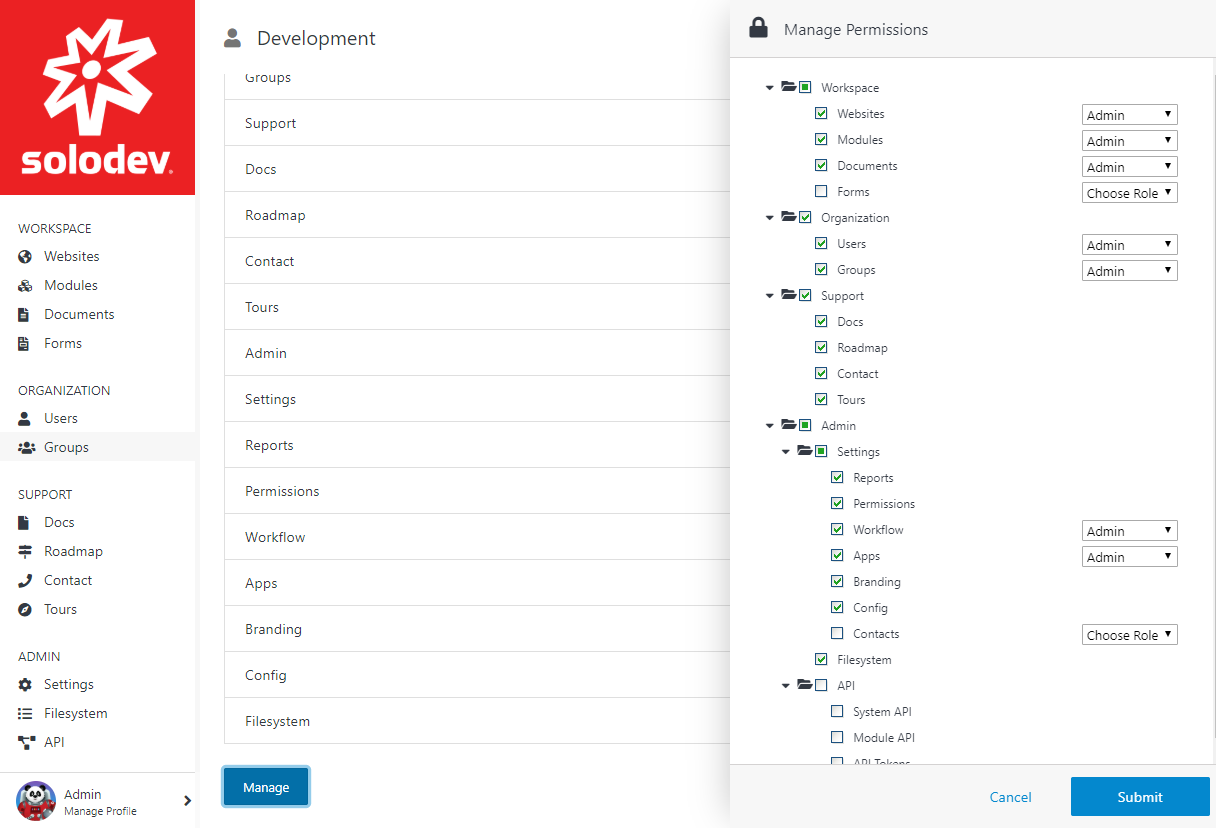
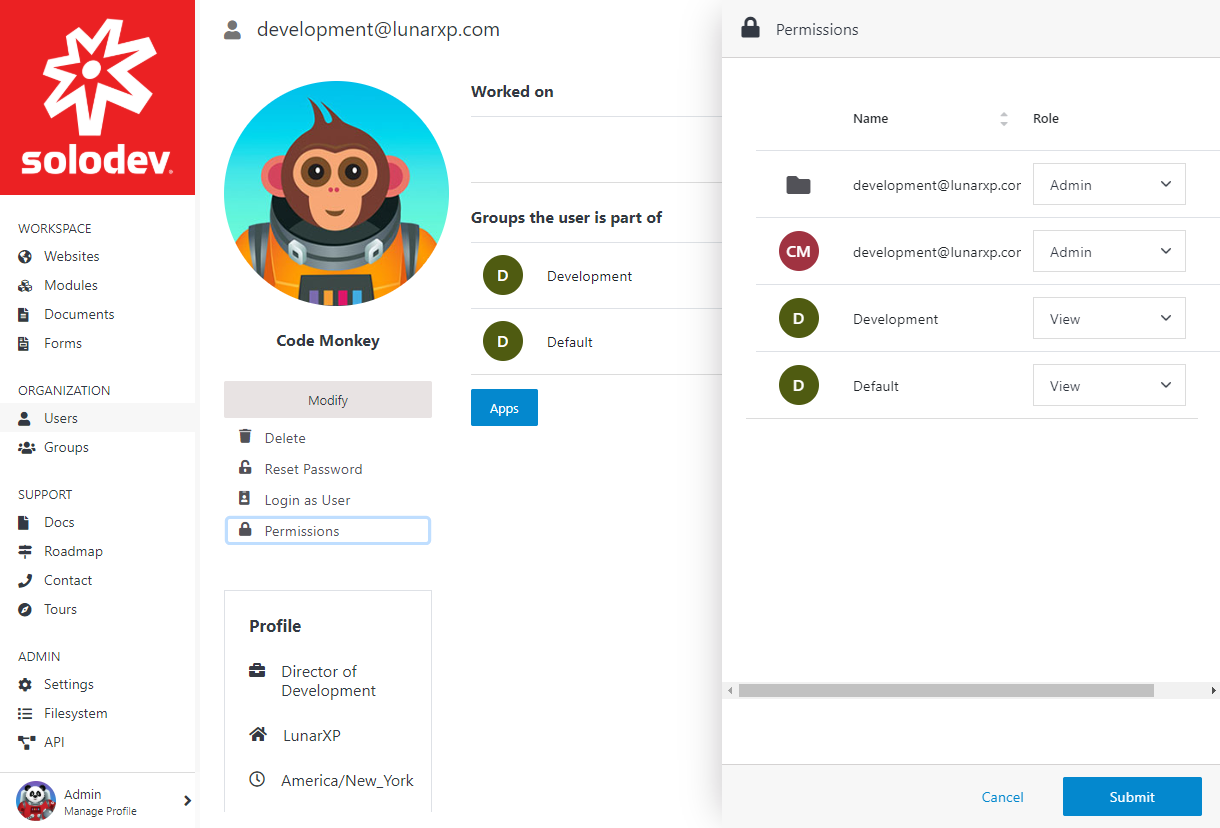
The permissions for the users and groups have the same settings. To access the App permissions for a group, inside the group page scroll down to the bottom of the page and click on Manage. It will open up the Manage Permissions modal where you can control every permission setting and detail. In the examples below, the group has been given administrative permissions for all the Workspace sections such as Websites, Modules, Documents as well as Organization, Support and Admin sections.
As a result, the user(s) assigned to the group will have access to the Dashboard shown below that allows them to access all the sections checked below:
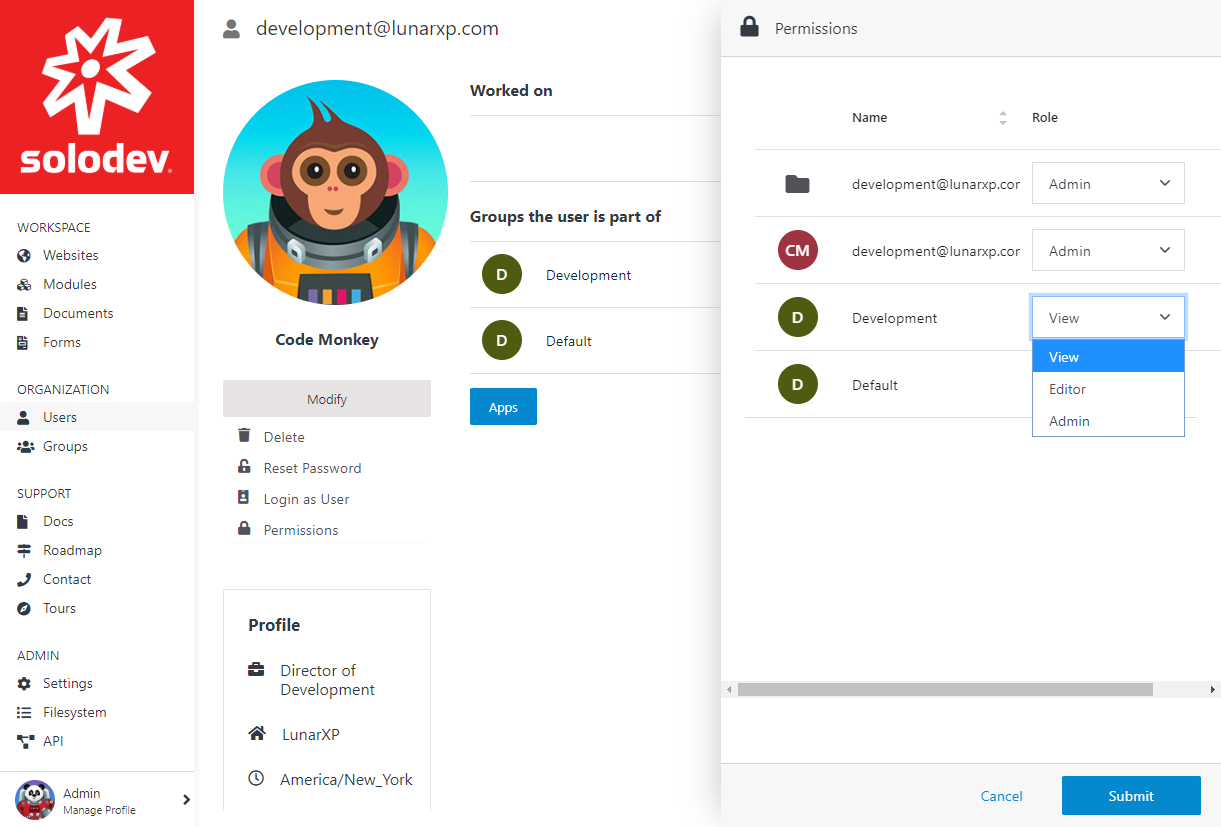
After you set the group permissions, you can go to a user's profile and make the changes you'd like, fine-tuning the permissions specific to that user and deciding their role. To do that, follow the steps below:
Step 1 - Find the user you'd like to edit on the group page
Step 2 - Click on Permissions
Step 3 - Using the dropdowns under Role, select a role for that user and hit Submit
With Solodev's intuitive user management system, you can easily add users, add them to groups, and specify all the permissions and settings and create a stress-free collaborative environment for your teams.

Paris Tuzun
Contributions Editor here at Solodev. Want to be featured on the Solodev Blog? Get in touch.
Follow me on Twitter


